PCR Restriction Digestion Failure: Solutions for Sites Too Close to Fragment Ends
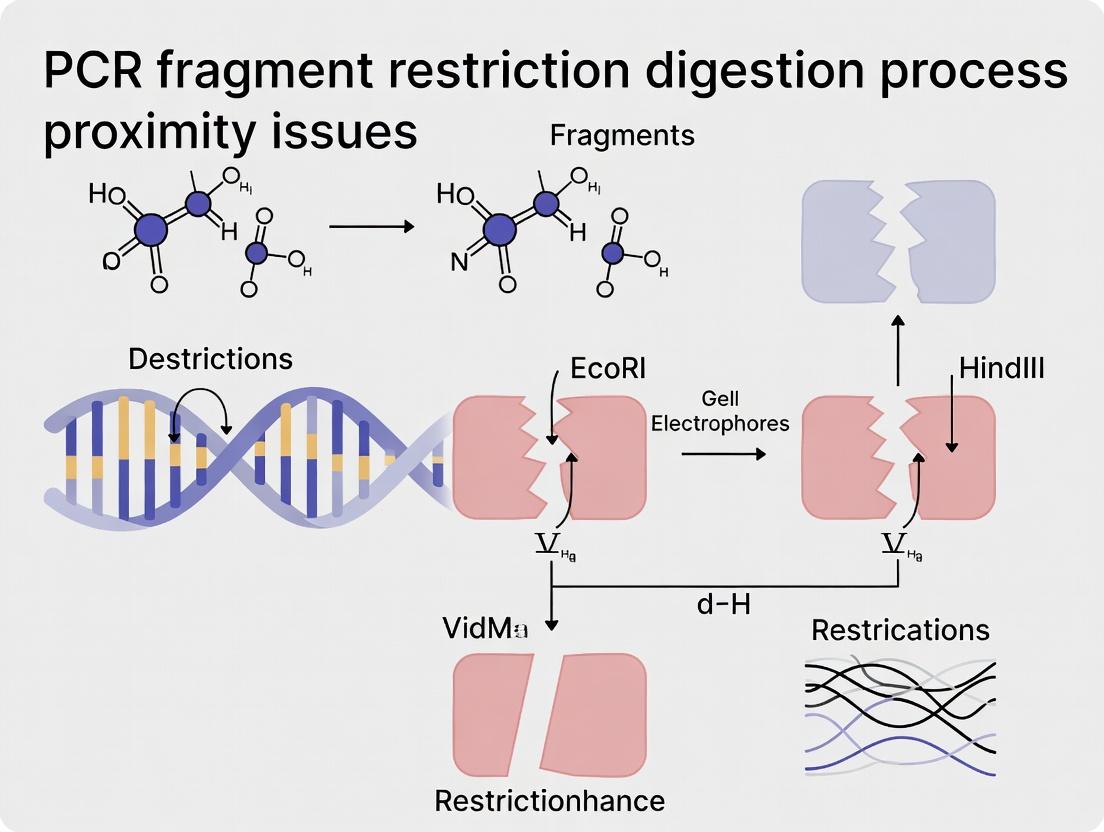
This article addresses the common molecular biology challenge of inefficient restriction enzyme digestion of PCR fragments, particularly when recognition sites are near the amplicon ends.
PCR Restriction Digestion Failure: Solutions for Sites Too Close to Fragment Ends
Abstract
This article addresses the common molecular biology challenge of inefficient restriction enzyme digestion of PCR fragments, particularly when recognition sites are near the amplicon ends. We explore the biophysical principles behind enzyme-substrate interactions at terminal sites, provide methodological strategies for primer design and modified protocols, offer a systematic troubleshooting guide for failed digestions, and compare validation techniques from traditional gel analysis to advanced capillary electrophoresis and sequencing. Targeted at researchers and drug development professionals, this guide synthesizes current knowledge to enhance cloning efficiency and downstream application success.
Why End-Proximal Restriction Sites Fail: A Structural Biology Perspective
Troubleshooting Guides & FAQs
Q1: Why is my restriction enzyme showing inefficient cleavage when the recognition site is very close to the end of my PCR-amplified DNA fragment? A: This is a well-documented issue known as "end effects" or "terminal cleavage inefficiency." Enzymes require a minimum number of base pairs flanking the recognition site for stable binding and efficient catalysis. When the site is within 10-15 bp of the terminus, steric hindrance from the blunt or overhanging end and reduced enzyme-DNA contacts can dramatically reduce cleavage rates, sometimes by over 90%.
Q2: How close is "too close" for a reliable restriction digest? A: The required flanking distance varies by enzyme and is influenced by buffer composition and incubation time. Below is a summary of quantitative data from recent studies on common enzymes.
Table 1: Cleavage Efficiency of Selected Enzymes at Terminal Sites
| Enzyme | Recognition Site | Min. Flanking bp for >90% Efficiency | Efficiency at 5 bp Flank | Key Factor |
|---|---|---|---|---|
| EcoRI | G^AATTC | 10 bp | 25-40% | Buffer ionic strength |
| BamHI | G^GATCC | 12 bp | 15-30% | Presence of BSA |
| HindIII | A^AGCTT | 8 bp | 50-70% | Incubation time |
| NotI | GC^GGCCGC | 15+ bp | <10% | Enzyme crowding |
| XhoI | C^TCGAG | 9 bp | 35-55% | Terminal sequence |
Q3: What experimental protocol can I use to diagnose and overcome terminal cleavage issues? A: Follow this Diagnostic Digest Protocol:
Reagent Setup:
- Test DNA: Your PCR fragment with terminal site.
- Control DNA: A plasmid or fragment where the same site is internal (>20 bp from any end).
- Enzyme & Buffer: Use the manufacturer's recommended buffer.
- Conditions: Set up parallel reactions for Test and Control DNA. Use 1 µg DNA, 10U enzyme, in 50 µL total volume.
Time-Course Experiment:
- Incubate at the optimal temperature (e.g., 37°C).
- Remove 10 µL aliquots at 5 min, 15 min, 30 min, 1 hr, 2 hr, and 4 hr.
- Immediately heat-inactivate each aliquot at 65°C for 20 min.
Analysis:
- Run all aliquots on a high-percentage agarose gel (2.5-3%).
- Compare the rate of disappearance of the uncut band in the Test vs. Control reactions.
- Quantify band intensity. Persistent uncut Test DNA after the Control is fully cut indicates a terminal cleavage problem.
Q4: Are there specific reagent solutions to improve terminal digestion efficiency? A: Yes, consider the following adjustments to your reaction:
Table 2: Research Reagent Solutions for Terminal Cleavage
| Reagent / Material | Function | Recommended Adjustment |
|---|---|---|
| Enzyme (Restriction Endonuclease) | Catalyzes phosphodiester bond cleavage. | Increase amount: Use 2-5x more enzyme (e.g., 20-50U per µg DNA). |
| Reaction Buffer | Provides optimal pH, ionic strength, cofactors. | Test alternative buffers: Some enzymes have activity in multiple buffers; a different salt concentration may help. |
| BSA (Bovine Serum Albumin) | Stabilizes enzyme, neutralizes contaminants. | Ensure it's present: Use BSA-supplemented buffer or add to 100 µg/mL final. |
| Incubation Time | Allows enzyme to overcome kinetic barriers. | Extend significantly: Incubate for 4-16 hours (overnight). |
| PCR Primers with Added 5' Flanks | Creates DNA with internalized site. | Redesign primers: Add 8-12 extra bases 5' to the recognition site in your primer. |
Q5: What is the underlying molecular mechanism causing this problem? A: The inefficiency stems from impaired enzyme-DNA complex formation. The enzyme binds DNA asymmetrically, contacting bases both within and outside the recognition sequence. A terminal location reduces the number of stabilizing electrostatic and hydrogen-bonding interactions, particularly for enzymes that dimerize or induce DNA bending.
Diagram Title: Mechanism of Terminal vs Internal Site Cleavage
Q6: Is there a standardized workflow to address this in my experimental pipeline? A: Follow this logical decision tree when planning your digestion.
Diagram Title: Workflow for Managing Terminal Cleavage Issues
Technical Support Center: Troubleshooting Restriction Digestion in PCR Fragment Analysis
This support center is designed to assist researchers encountering issues with restriction endonuclease digestions, specifically within the context of PCR fragment analysis for proximity ligation and mapping studies. The guidance is framed within ongoing thesis research on PCR fragment restriction digestion proximity issues, which investigates steric and sequence-context factors affecting double-digestion efficiency.
Frequently Asked Questions (FAQs) & Troubleshooting
Q1: My restriction digest of a purified PCR fragment shows incomplete or no digestion. What are the primary causes? A: Incomplete digestion is a common issue. The leading causes, in order of likelihood, are:
- Insufficient Enzyme Activity: Enzyme is inactivated by repeated freeze-thaw cycles, improper storage, or overheating during setup.
- Substrate Impurity: PCR fragments often contain residual primers, dNTPs, salts (like KCl), or dimethyl sulfoxide (DMSO) from the amplification reaction, which can inhibit many restriction enzymes.
- Incorrect Buffer Conditions: Using the wrong buffer or a buffer with suboptimal ionic strength (e.g., incorrect NaCl/Mg²⁺ concentration) drastically reduces efficiency.
- Methylation Interference: Dam or Dcm methylation in E. coli-derived plasmid DNA, or CpG methylation in genomic DNA, can block certain restriction sites.
- Steric Hindrance (Proximity Issue): For your thesis research, consider that the enzyme's binding footprint may extend beyond the recognition sequence. If the cut site is too close (<10-20 bp) to the fragment end, binding and cleavage efficiency can be severely impaired.
Q2: When performing a double-digest on a single PCR fragment, one enzyme works but the other does not, despite both being active individually. Why? A: This is a core "proximity issue" relevant to your thesis. Key factors include:
- Buffer Incompatibility: The two enzymes may not have >80% activity in a single, commercially available "universal" buffer. Always check the manufacturer's compatibility chart.
- Star Activity: Using a suboptimal buffer or excessive units of enzyme can lead to non-specific cleavage, degrading your fragment.
- Sequential Digestion Required: If no single buffer supports both enzymes, a sequential digest with a buffer change (via purification or heat inactivation) is necessary.
- Sequence Context Inhibition: As your thesis hypothesizes, local DNA structure (e.g., secondary structure, high GC content) or proteins bound nearby can physically block one enzyme but not the other.
Q3: How do I troubleshoot a suspected "proximity to fragment end" issue affecting digestion? A: Design a controlled experiment:
- Clone your PCR fragment into a standard plasmid vector.
- Perform the digest on the plasmid, where the site is now internally located with ample flanking sequence.
- If digestion proceeds efficiently on the plasmid but not on the linear PCR fragment, proximity to the end is a likely contributor. Include a control digest on a plasmid with a known, internally-located site for the same enzyme.
Q4: What is the optimal amount of enzyme and incubation time to avoid star activity while ensuring complete digestion? A: Follow the quantitative guidance in the table below. The rule of thumb is 1 unit of enzyme per µg of DNA for 1 hour. Do not exceed 10% of the total reaction volume with enzyme stock to avoid glycerol inhibition.
Table 1: Common Restriction Endonuclease Inhibitors & Tolerance Levels
| Inhibitor (Common Source) | Typical Concentration Tolerated by Most Enzymes | Recommended Remedial Action |
|---|---|---|
| Salt (KCl/NaCl) (PCR Buffer) | <50 mM | Purify fragment (spin column/gel extraction). Dilute DNA solution. |
| DMSO (PCR Additive) | <1% (v/v) | Purify fragment. Avoid in digest if possible. |
| Ethanol (DNA Precipitation) | <0.5% (v/v) | Ensure pellet is fully dry before resuspension. |
| Glycerol (Enzyme Storage) | <5% (v/v) | Keep total enzyme volume <10% of reaction. |
| EDTA (Elution Buffer) | <0.1 mM | Use Tris-HCl or water for DNA elution/resuspension. |
Table 2: Standard Digestion Protocol Parameters
| Parameter | Standard Condition | Range for Optimization | Notes for Thesis (Proximity Issues) |
|---|---|---|---|
| Enzyme Units per µg DNA | 5-10 units | 1-20 units | For problem sites near fragment ends, increase to 10-20 U/µg and extend time. |
| Incubation Time | 1 hour | 15 min - 16 hours (overnight) | Overnight digestion with extra enzyme often resolves difficult cuts. |
| Incubation Temperature | 37°C (most) | Varies by enzyme | Always verify optimal temperature (e.g., 25°C for SmaI, 65°C for TaqI). |
| DNA Purity | A260/A280 ~1.8 | N/A | Critical. Impurities are the most common cause of failure. |
Experimental Protocols
Protocol 1: Purification of PCR Fragments for Optimal Digestion Purpose: To remove PCR amplification inhibitors prior to restriction digestion. Method:
- Perform PCR using a high-fidelity polymerase.
- Add 5 volumes of Binding Buffer (from gel extraction kit) to 1 volume of PCR product.
- Apply mixture to a silica spin column, incubate 1 minute, centrifuge at 13,000 x g for 1 minute.
- Discard flow-through, wash with 700 µL Wash Buffer, centrifuge. Repeat wash.
- Centrifuge empty column for 1 minute to dry membrane.
- Elute DNA in 30 µL of nuclease-free water (not Tris-EDTA buffer) pre-heated to 65°C. Let stand 2 minutes before centrifugation.
Protocol 2: Diagnostic Double-Digest with Buffer Optimization Purpose: To test compatibility of two enzymes on a single PCR fragment, accounting for potential proximity effects. Method:
- Purify the target PCR fragment as per Protocol 1. Quantify via spectrophotometry.
- Set up four parallel 20 µL reactions:
- Tube A: 1 µg DNA, Buffer X (Enzyme 1 optimal), 10 U Enzyme 1.
- Tube B: 1 µg DNA, Buffer Y (Enzyme 2 optimal), 10 U Enzyme 2.
- Tube C: 1 µg DNA, Buffer Z (Manufacturer's recommended "universal" buffer), 10 U Enzyme 1 + 10 U Enzyme 2.
- Tube D (Control): 1 µg DNA, Buffer Z, no enzyme.
- Incubate all tubes at 37°C for 2 hours.
- Heat-inactivate at 80°C for 20 minutes (if enzymes are thermolabile).
- Analyze all reactions alongside a DNA ladder on a 2% agarose gel. Interpretation: If Tube C shows incomplete digestion but A and B are complete, the buffer is likely suboptimal. If digestion is incomplete in A, B, or C on the PCR fragment but works on a plasmid control, a sequence-context or proximity issue is implicated.
Mandatory Visualizations
Diagram 1: Restriction Digest Troubleshooting Workflow
Diagram 2: Restriction Endonuclease Catalytic Cycle
The Scientist's Toolkit: Research Reagent Solutions
Table 3: Essential Materials for Restriction Digestion Studies
| Item | Function & Relevance to Thesis Research |
|---|---|
| High-Fidelity PCR Polymerase | Generates pure, high-yield PCR fragments with minimal primer-dimer artifacts, providing optimal substrate for digestion. |
| PCR Clean-Up / Gel Extraction Kit | Removes enzymatic inhibitors (salts, dNTPs, primers). Critical step before digesting PCR products. |
| Restriction Enzymes (High-Fidelity/HS Variants) | Engineered for reduced star activity and higher tolerance to common impurities, allowing for more flexible buffer optimization. |
| Universal/Multi-Core Buffers | Commercial buffer systems designed to provide >80% activity for many enzymes, facilitating double-digests and testing. |
| Rapid DNA Ligation Kit | For cloning PCR fragments into plasmids to create internal-site controls, a key experiment for proximity issue research. |
| Thermal Cycler with Heated Lid | Allows for precise incubation temperatures and can be used for heat inactivation of enzymes post-digestion. |
| High-Resolution Agarose | For clear separation of digested fragments, especially important when analyzing small size differences from end-proximal cuts. |
| DNA Ladder (Low Range) | Essential for accurately sizing digestion products and confirming complete vs. partial digestion. |
| Spectrophotometer/Nanodrop | For accurate quantification of DNA concentration and assessment of purity (A260/A280, A260/A230 ratios). |
| Methylation-Sensitive & -Insensitive Isoschizomers (e.g., MspI/HpaII) | Reagents to test for methylation as a potential cause of digestion blockage, a key control experiment. |
Technical Support Center
Troubleshooting Guides & FAQs
Issue Category 1: Incomplete or Inefficient Restriction Digestion
Q1: My PCR fragment digestion is consistently incomplete, even with extended incubation times. What could be the cause?
- A: This is a classic symptom of a steric hurdle. The primary suspects are:
- Buffer Composition: The standard restriction enzyme buffer may not be optimal for your specific PCR product. Components like salt concentration (NaCl/KCl) and cofactors (Mg2+) can affect both enzyme activity and DNA conformation.
- DNA Conformation: Secondary structures (hairpins, G-quadruplexes) near the restriction site can physically block enzyme access.
- End Accessibility: The proximity of the restriction site to the fragment end (PCR primer region) can cause steric hindrance if the enzyme requires more DNA "overhang" than is available.
- Protocol for Diagnosis (PCR Clean-up & Re-digestion Test):
- Purify your PCR product using a silica-membrane column or magnetic bead-based clean-up kit to remove primers, dNTPs, and polymerase.
- Elute in nuclease-free water (not TE buffer, as EDTA inhibits enzymes).
- Set up parallel digestion reactions:
- Tube A: Purified DNA + Standard Buffer.
- Tube B: Purified DNA + Buffer recommended for "difficult" sites (often high-salt or special "CutSmart"-type buffers).
- Tube C: Purified DNA + Standard Buffer + Additive (e.g., 1-2 mM Spermidine, which can compact DNA and aid cutting; or 0.1% Triton X-100).
- Incubate at recommended temperature for 1 hour and 3 hours. Analyze by gel electrophoresis.
- A: This is a classic symptom of a steric hurdle. The primary suspects are:
Q2: How can I determine if my PCR primer design is causing end-proximity issues?
A: Perform an in silico and experimental assessment.
- Protocol (Primer Redesign & Test):
- Use design software to check the distance from the restriction site to the 5' end of your amplicon. A distance of <10 bp is often problematic for many enzymes.
- Redesign primers to add a 5-10 nucleotide "leader" sequence before the restriction site homology.
- Compare digestion efficiency of the original vs. new primer sets on the same template, using identical purification and digestion conditions (see protocol above).
Quantitative Data Summary:
Table 1: Digestion Efficiency vs. Site-to-End Distance
Distance from Restriction Site to 5' End (bp) Relative Digestion Efficiency (%)* Notes 2 10-25% Severe steric hindrance. 5 40-60% Significant impairment. 8 70-85% Moderate improvement. ≥10 95-100% Optimal accessibility. *Efficiency measured by densitometry of gel bands; values are generalized and enzyme-dependent.
- Protocol (Primer Redesign & Test):
Issue Category 2: Buffer and Additive Optimization
Q3: Which buffer component has the most significant impact on overcoming steric hurdles?
- A: While enzyme-specific, BSA (Bovine Serum Albumin) and salt concentration are critical. BSA stabilizes enzymes and can neutralize weak inhibitory factors. Salt concentration (ionic strength) directly influences DNA conformation (flexibility/rigidity) and protein-DNA binding kinetics.
- Protocol (Buffer Component Titration):
- Prepare a master mix of DNA and enzyme.
- Aliquot into tubes containing buffer cores at different final NaCl concentrations (e.g., 0 mM, 50 mM, 100 mM, 150 mM).
- To half the tubes, add BSA to 0.1 mg/mL final concentration.
- Incubate and analyze by gel. Use densitometry for quantification.
- Protocol (Buffer Component Titration):
- A: While enzyme-specific, BSA (Bovine Serum Albumin) and salt concentration are critical. BSA stabilizes enzymes and can neutralize weak inhibitory factors. Salt concentration (ionic strength) directly influences DNA conformation (flexibility/rigidity) and protein-DNA binding kinetics.
Q4: Are there commercial reagent kits specifically for difficult digests?
A: Yes. Several manufacturers offer "high-fidelity" or "time-saver" enzyme formulations with optimized buffers designed for challenging contexts, including proximity to ends.
Table 2: Commercial Reagent Solutions for Challenging Digests
Reagent Name (Example) Key Component/Feature Proposed Function in Overcoming Steric Hurdles CutSmart Buffer (NEB) Pre-mixed, universal Optimized ionic strength & BSA to enhance enzyme stability and access. HF (High-Fidelity) Restriction Enzymes (NEB, Thermo) Engineered enzyme variants Reduced star activity allows use of higher enzyme units for longer times. rCutSmart Buffer (NEB) Recombinant Albumin Eliminates potential contaminants found in BSA that may inhibit digestion. FastDigest Green Buffer (Thermo) Specialized formulation & dye Provides ideal conditions for fast, complete digestion in one buffer.
The Scientist's Toolkit: Key Research Reagent Solutions
Table 3: Essential Materials for Investigating Steric Hurdles in Digestion
| Item | Function in This Context |
|---|---|
| High-Fidelity PCR Master Mix | Generates clean, high-yield PCR fragments with minimal non-target products that can complicate analysis. |
| PCR Purification Kit | Removes primers, dNTPs, and salts that can interfere with subsequent enzymatic steps. |
| Restriction Enzymes (Standard & HF versions) | Core reagents. Comparing standard vs. HF versions under identical conditions highlights buffer/steric effects. |
| Bovine Serum Albumin (BSA, molecular biology grade) | Stabilizes restriction enzymes; crucial additive for digestions prone to steric issues. |
| Spermidine (1M Solution) | A polycation that can condense DNA, potentially altering local conformation to expose blocked sites. |
| Dye-Free Gel Loading Buffer | Allows for post-electrophoresis staining without interference from tracking dyes like bromophenol blue. |
| DNA Gel Extraction Kit | To purify the correctly digested fragment from agarose for downstream applications (cloning, sequencing). |
Visualized Workflows & Relationships
Diagram 1: Diagnostic Path for Digestion Failure
Diagram 2: Buffer Roles in Digestion
FAQs & Troubleshooting Guide
Q1: What is the minimum 5' overhang length required for efficient ligation of a digested PCR fragment into a vector? A1: The generally accepted minimum for stable association and efficient ligation is a 4-base 5' overhang (a 4-base "sticky end"). While 2-base overhangs can sometimes ligate, efficiency is significantly reduced, and 1-base overhangs are highly inefficient and not recommended for standard cloning. The requirement is influenced by buffer conditions and temperature.
Q2: Why does my restriction digestion of a PCR product fail even with the correct enzyme, and how does buffer compatibility affect this? A2: Failure often stems from incomplete digestion due to suboptimal buffer conditions. PCR components (especially polymerase buffers, dNTPs, and residual primers) can inhibit restriction enzymes. Furthermore, if your fragment requires a double digest with two enzymes, their buffer compatibility is critical. Always perform a post-PCR purification before digestion and consult the manufacturer's buffer compatibility charts. Incompatible buffers can drastically reduce enzyme activity, leading to partial or no digestion.
Q3: What does "cleavage" or "digestion" overhang refer to, and how does it differ from a "buffer" overhang? A3: These are related but distinct concepts:
- Cleavage/Digestion Overhang: The single-stranded DNA sequence left after a restriction enzyme cuts. It is a physical property of the enzyme (e.g., EcoRI leaves a 5'-AATT overhang).
- Buffer Overhang Requirement: This is a colloquial term referring to the need for sufficient sequence length beyond the recognition site within your PCR fragment to ensure the enzyme can bind and cleave efficiently. Insufficient flanking DNA ("buffer") can lead to poor cleavage.
Q4: What is the minimum flanking DNA ("buffer") required on each side of a recognition site for efficient cleavage? A4: Most restriction enzymes require a minimum of 6-10 base pairs of non-specific flanking DNA on each side of their recognition sequence for optimal activity. Designing primers with only 2-3 bases flanking the site is a common cause of digestion failure in PCR products.
Q5: How can I troubleshoot failed ligation after a seemingly successful double digest of my PCR fragment and vector? A5: First, verify digestion completeness on an analytical gel for both fragment and vector. Common issues include:
- Phosphatase Treatment: If you dephosphorylated the vector, ensure your PCR fragment is properly phosphorylated (use phosphorylated primers or treat with polynucleotide kinase).
- Overhang Compatibility: Confirm the overhangs generated are truly compatible and complementary.
- Molar Ratio: Optimize the insert:vector molar ratio (typical starting point is 3:1 to 10:1).
- Fragment Purity: Re-purify the digested fragment to remove salts and enzymes that can inhibit ligase.
Table 1: Minimum Flanking Base Pair Requirements for Common Restriction Enzymes
| Enzyme (Example) | Recognition Sequence | Cleavage Overhang | Minimum Flanking Bases (5' side) | Minimum Flanking Bases (3' side) | Notes |
|---|---|---|---|---|---|
| EcoRI | GAATTC | 5'-AATT | 6 bp | 6 bp | Star activity in low salt. |
| BamHI | GGATCC | 5'-GATC | 5 bp | 5 bp | Sensitive to CpG methylation. |
| HindIII | AAGCTT | 5'-AGCT | 4 bp | 4 bp | Requires BSA for stability. |
| XhoI | CTCGAG | 5'-TCGA | 3 bp | 3 bp | Common in polylinkers. |
| NotI | GCGGCCGC | 5'-GGCCGC | 10 bp | 10 bp | Requires long flanking DNA. |
| EcoRV | GATATC | Blunt | 4 bp | 4 bp | Blunt cutters often need less flank. |
Table 2: Troubleshooting Common Digestion & Ligation Issues
| Symptom | Possible Cause | Recommended Solution |
|---|---|---|
| No Digestion | 1. PCR inhibitors present.2. Incompatible buffer.3. Recognition site missing/flanked incorrectly. | 1. Clean up PCR product.2. Use universal buffer or sequential digest.3. Verify fragment sequence and primer design. |
| Partial Digestion | 1. Insufficient enzyme units or time.2. Suboptimal temperature.3. Insufficient flanking DNA ("buffer"). | 1. Increase units (2-10 U/μg), incubate longer.2. Ensure correct incubation temp.3. Redesign primers to add >6 bp flank. |
| Failed Ligation | 1. Incompatible or damaged overhangs.2. Incorrect insert:vector ratio.3. Lack of 5' phosphate on insert. | 1. Run gel to check fragment sizes/health.2. Set up ratio gradient (1:1 to 10:1).3. Use phosphorylated primers or kinase treat insert. |
| High Vector Re-ligation | Incomplete dephosphorylation (if applied). | Increase phosphatase incubation time; heat-inactivate thoroughly. |
Experimental Protocols
Protocol 1: Standard Restriction Digestion of a Purified PCR Fragment
Objective: To completely digest a PCR-amplified DNA fragment with one or two restriction enzymes for subsequent ligation. Materials: Purified PCR DNA, restriction enzyme(s), compatible 10x buffer, nuclease-free water, incubator. Method:
- In a sterile microfuge tube, assemble the following reaction on ice:
- Purified PCR DNA (up to 1 μg): X μL
- 10x Restriction Buffer: 2.0 μL
- Restriction Enzyme 1 (10 U/μL): 1.0 μL
- Restriction Enzyme 2 (10 U/μL, if needed): 1.0 μL
- Nuclease-free water: to 20.0 μL final volume.
- Mix gently by pipetting. Centrifuge briefly.
- Incubate at the recommended temperature (usually 37°C) for 1-2 hours. For difficult sites or NotI-like enzymes, extend to 4 hours or overnight.
- Heat-inactivate the enzyme(s) if recommended (e.g., 65°C for 20 min).
- Purify the digested DNA using a spin column or gel extraction before ligation.
Protocol 2: Sequential Digestion for Incompatible Buffers
Objective: To perform a double digest when the two required enzymes lack a common optimal buffer. Materials: Purified DNA, Enzyme A, Buffer A, Enzyme B, Buffer B, nuclease-free water, purification kit. Method:
- Set up and run the first digestion with Enzyme A in its optimal Buffer A. Use standard conditions (1 hr, appropriate temp).
- Purify the DNA using a spin column to remove Buffer A and Enzyme A completely.
- Elute the DNA in nuclease-free water or TE buffer.
- Set up the second digestion with Enzyme B in its optimal Buffer B, using the eluted DNA as the substrate.
- Incubate, then heat-inactivate and purify the doubly-digested fragment as needed.
Visualizations
Diagram Title: PCR Fragment Digestion and Cloning Workflow
Diagram Title: Anatomy of a Restriction Site Showing Flank and Overhang
The Scientist's Toolkit: Research Reagent Solutions
| Item | Function in Experiment | Key Consideration |
|---|---|---|
| High-Fidelity DNA Polymerase | PCR amplification of insert fragment with minimal errors. | Critical for maintaining exact sequence of added restriction sites. |
| Restriction Endonucleases | Cleave DNA at specific sequences to generate compatible ends. | Check buffer compatibility, star activity risk, and required flanking bases. |
| Universal / Compatible Buffer | Provide optimal ionic conditions for enzyme activity. | Enables efficient double digests without sequential steps. |
| DNA Clean-Up / Gel Extraction Kit | Purify PCR products and digested DNA from enzymes, salts, and agarose. | Essential for removing inhibitors before next enzymatic step. |
| T4 DNA Ligase & Buffer | Covalently join vector and insert DNA via phosphodiester bonds. | Buffer often includes ATP; requires compatible ends and 5' phosphates. |
| Rapid Dephosphorylation Kit | Remove 5' phosphates from linearized vector to prevent re-circularization. | Used for vector preparation; must be thoroughly heat-inactivated. |
| DNA Ladder (High-Resolution) | Accurately size PCR fragments and digested products on agarose gels. | Allows confirmation of complete digestion and correct fragment isolation. |
| Competent E. coli Cells | Uptake and propagate the ligated plasmid DNA after transformation. | High efficiency (>10^7 cfu/μg) is recommended for library or difficult cloning. |
Troubleshooting Guides & FAQs
Q1: After digesting my PCR fragment, I get very low ligation efficiency into my vector. What could be the issue?
A: This is a classic symptom of incomplete or inefficient restriction digestion, often due to proximity effects. When restriction sites are too close to the fragment ends (typically < 10 bp), enzymes exhibit reduced efficiency due to steric hindrance with the DNA end. This leaves a significant portion of your fragments with incompatible ends for ligation.
Solution:
- Design Check: Verify the distance from the restriction site to the 5' end of your primer. Redesign primers to add 4-6 extra bases 5' of the restriction site.
- Protocol Adjustment: Use a 2-3x excess of restriction enzyme and extend digestion time to 2-3 hours. A post-PCR purification step before digestion can remove dNTPs and primers that may interfere.
- Alternative Strategy: Consider using a polymerase with a 3'-A overhang (like Taq) and TA-cloning, or switch to a seamless cloning method (Gibson Assembly, NEBuilder) that is less sensitive to end-proximity.
Q2: My site-directed mutagenesis fails when the mutation is designed near a primer end. How can I improve success?
A: Mutagenic primers require sufficient sequence flanking the mutation site (both 5' and 3') for robust polymerase binding and extension. Proximity to the 5' end can drastically reduce primer annealing efficiency and polymerase fidelity.
Solution:
- Primer Design Rule: Ensure at least 10-15 nucleotides of correct sequence flank both sides of the mutation site. The melting temperature (Tm) of the entire primer should be >78°C for QuikChange-style protocols.
- Use High-Fidelity Polymerase: Employ a polymerase with high processivity and strand displacement ability (e.g., Q5, KAPA HiFi) for the extension step.
- DpnI Digestion: Extend DpnI digestion time to 2 hours to ensure complete removal of methylated template DNA, especially if extension efficiency was suboptimal.
Q3: During NGS library prep, I observe low yields after the adapter ligation step when using restriction enzyme-based fragmentation. What's the cause?
A: This points to an issue with end-repair or A-tailing efficiency, which can be a downstream consequence of restriction enzyme "star activity" or incomplete digestion due to site proximity, generating heterogeneous ends that are poor substrates for subsequent enzymes.
Solution:
- Optimize Digestion: Avoid overdigestion (excessive enzyme or time) that can induce star activity. Use optimized buffers specific to your enzyme.
- Purification: Implement a rigorous size-selection and clean-up step post-fragmentation and post-end-repair to remove enzymes and buffer components.
- Validate Ends: Run an aliquot of fragmented DNA on a Bioanalyzer to assess size distribution and homogeneity before proceeding to end-repair.
Q4: My diagnostic digest of a plasmid clone shows the correct insert size, but sequencing reveals scrambled or unexpected sequences at the junction. Why?
A: This can result from ligation of multiple, incompletely digested fragments. If restriction sites are inefficiently cut due to proximity, the fragment may have complementary but incorrect ends that promote ligation with other fragments or vector molecules in a non-specific manner.
Solution:
- Gel Purification: Always gel-purify your restriction-digested insert fragment to isolate the exact size band away from uncut or partially cut products.
- Phosphatase Treatment: Treat your digested vector with calf intestinal alkaline phosphatase (CIP) to prevent self-ligation, forcing it to ligate only with your properly digested insert.
- Sequencing Primer: Use a primer that reads inward from the vector backbone across the insertion site for initial colony verification.
Table 1: Ligation Efficiency vs. Restriction Site Proximity to DNA End
| Distance from 5' End (base pairs) | Relative Digestion Efficiency (%) | Relative Ligation Yield (%) | Common Downstream Outcome |
|---|---|---|---|
| 3 | 15-25 | <5 | Cloning failure, mixed colonies |
| 5 | 40-60 | 10-20 | Low yield, requires more screening |
| 8 | 75-90 | 50-75 | Moderate success |
| ≥10 | 95-100 | 85-95 | High success, reliable workflow |
Table 2: Success Rate of Site-Directed Mutagenesis Based on Primer Design
| Mutation Position from Primer 5' End | Estimated Primer Annealing Efficiency | Mutagenesis Success Rate |
|---|---|---|
| Base 1-3 | Very Low (<20%) | <10% |
| Base 4-7 | Low (20-50%) | 10-40% |
| Base 8-12 | Moderate (50-80%) | 40-70% |
| Base 13+ | High (>80%) | 70-95% |
Detailed Experimental Protocols
Protocol 1: Assessing Restriction Digestion Efficiency of Proximal Sites
Objective: To quantitatively measure the cleavage efficiency of a restriction enzyme when its recognition site is positioned close to a PCR amplicon's terminus.
Materials:
- Purified PCR fragment with site 5 bp from end.
- Corresponding restriction enzyme and buffer.
- Control fragment with site 15 bp from end.
- Agarose gel electrophoresis system.
- DNA quantification system (e.g., Qubit).
Methodology:
- Set up identical 50 µL digestion reactions for test and control fragments (500 ng DNA each).
- Use 10 units of enzyme. Incubate at recommended temperature.
- Remove 10 µL aliquots at t=0, 15 min, 30 min, 60 min, and 120 min.
- Heat-inactivate each aliquot immediately.
- Run all aliquots on a high-percentage agarose gel (2.5%).
- Stain with SYBR Safe, image, and quantify band intensities for cut vs. uncut DNA using ImageJ software.
- Plot digestion percentage vs. time for both fragments to generate kinetic efficiency curves.
Protocol 2: Rescue Protocol for Low-Efficiency Digestions in Cloning Workflows
Objective: To maximize cloning success when primer redesign is not feasible.
Materials:
- PCR product with suboptimal restriction site placement.
- High-fidelity DNA polymerase with 3'→5' exonuclease (proofreading) activity.
- dNTPs.
- T4 DNA Polymerase.
- Standard cloning vector and ligation kit.
Methodology:
- Perform the standard restriction digest on your PCR product. Do not purify.
- To the digestion mix, directly add 1 µL of proofreading polymerase (e.g., Pfu), 1 µL of dNTPs (10 mM), and appropriate buffer. Incubate at 72°C for 15-20 minutes. This "end-polishing" step can help resolve frayed ends and create blunt termini.
- If creating blunt ends for cloning, treat with T4 DNA Polymerase (in the presence of dNTPs) for 15 min at 12°C, then heat-inactivate.
- Gel-purify the resulting fragment.
- Proceed with a standard blunt-end ligation into a prepared vector. Increase ligation incubation time to 16 hours at 16°C.
Diagrams
Title: Impact of Proximal Restriction Sites on Downstream Workflows
Title: Experimental Rescue Protocol for Proximal Digestion Issues
The Scientist's Toolkit: Research Reagent Solutions
Table 3: Essential Reagents for Mitigating Proximity Issues
| Reagent / Kit Name | Primary Function | Role in Addressing Proximity Issues |
|---|---|---|
| Q5 High-Fidelity DNA Polymerase (NEB) | High-fidelity PCR amplification. | Generates clean, blunt-ended fragments ideal for subsequent polishing or seamless assembly, reducing reliance on restriction sites. |
| FastDigest / Time-Saver Restriction Enzymes (Thermo Fisher) | Rapid DNA digestion. | Allows use of higher enzyme concentrations for shorter times, potentially improving cut efficiency on challenging sites. |
| NEBuilder HiFi DNA Assembly Master Mix (NEB) | Gibson Assembly-based cloning. | Enables seamless, restriction-free assembly of multiple fragments, completely bypassing proximity limitations. |
| T4 DNA Polymerase (NEB) | 3'→5' exonuclease (blunting) and 5'→3' polymerase activity. | Converts sticky or frayed ends from poor digestion into uniform blunt ends for reliable blunt-end cloning. |
| Calf Intestinal Alkaline Phosphatase (CIP) (NEB) | Removes 5' phosphate groups. | Treats vector backbone to prevent self-ligation, crucial when using a sub-optimally digested insert pool. |
| KAPA HyperPrep Kit (Roche) | NGS library preparation. | Includes robust end-repair and A-tailing modules that can handle heterogeneous ends from restriction-based fragmentation. |
| Phusion U Green Multiplex PCR Master Mix (Thermo Fisher) | High-yield multiplex PCR. | Provides robust amplification even with suboptimal primer binding (e.g., in mutagenesis where mutation is near primer end). |
Designing for Success: Primer Strategies and Protocol Adjustments
Technical Support Center
Troubleshooting Guides & FAQs
Q1: Why are my PCR products degraded or inefficiently digested when I add restriction sites for cloning? A: This is often due to restriction digestion proximity issues. The restriction enzyme requires a specific number of flanking nucleotides (typically 4-8 bp, but varies by enzyme) 5' to its recognition site for efficient binding and cleavage. If the primer places the site too close to the fragment end (< recommended bp), cutting efficiency drops drastically, leading to incomplete digestion.
Q2: How many protective bases should I add 5' to my restriction site in the primer? A: The optimal number is enzyme-specific. A general rule is to add 4-6 bp, but you must consult the manufacturer's data. Below is a summary of common enzyme requirements based on current supplier specifications.
Table 1: Recommended 5' Flanking Bases for Common Restriction Enzymes
| Restriction Enzyme | Minimum Flanking Bases (5') for >90% Efficiency | Optimal Flanking Bases (5') | Notes |
|---|---|---|---|
| BamHI (G^GATCC) | 3 bp | 6 bp | NEB notes reduced efficiency with <3 bp flank. |
| EcoRI (G^AATTC) | 2 bp | 4-6 bp | Thermo Fisher recommends ≥4 bp for reliable digestion. |
| HindIII (A^AGCTT) | 3 bp | 6 bp | Sensitive to proximity; >6 bp often used for cloning. |
| XhoI (C^TCGAG) | 3 bp | 6 bp | Cutting near ends is inefficient without sufficient flank. |
| NotI (GC^GGCCGC) | 4 bp | 8-10 bp | Large recognition site requires more protection. |
| KpnI (GGTAC^C) | 2 bp | 4-6 bp | Fairly tolerant, but 4+ bp is standard practice. |
Q3: What sequence should these protective bases be? A: The sequence is critical. They should be:
- Non-complementary to the template to prevent mispriming.
- Neutral in composition—often chosen to maintain an overall primer GC content of 40-60%.
- Non-palindromic to prevent forming secondary structures or creating accidental new restriction sites.
Example: For a primer with an EcoRI site: 5'-
[6bp protective][GAATTC][gene-specific sequence]-3'. The 6bp protective sequence (e.g.,ATCGTA) should be designed based on the rules above.
Q4: My digestion still fails after adding flanking bases. What else could be wrong? A: Consider these factors:
- Enzyme Starvation: The primer may contain an internal, secondary recognition site for the same enzyme, leading to "star" activity or substrate competition. Always check the full primer sequence.
- PCR Template Carryover: Residual nucleotides and polymerase from PCR can inhibit digestion. Always purify the PCR product before digestion.
- Inefficient Digestion of PCR Ends: The double-stranded DNA end created by PCR can be structurally different from an internal site. Using a protocol with enzyme overdigestion (2-3x enzyme, 2-3x time) can help.
Experimental Protocol: Evaluating Flanking Base Efficacy in Cloning
Objective: To systematically test how the length of 5' protective bases affects restriction digestion efficiency and subsequent ligation cloning success.
Materials: Template DNA, Forward Primers with varying 5' flank lengths (0, 2, 4, 6, 8 bp) followed by a fixed restriction site (e.g., *EcoRI) and gene-specific sequence, Reverse Primer, High-Fidelity DNA Polymerase, PCR Purification Kit, Restriction Enzymes & Buffer, T4 DNA Ligase, Cloning Vector, Competent Cells.*
Method:
- PCR Amplification: Perform separate PCR reactions for each primer (varying flank length). Use identical cycling conditions.
- Product Purification: Clean all PCR products using a spin column kit. Quantify DNA concentration.
- Restriction Digest:
- Set up identical 50 µL digestions for each product: 500 ng DNA, 1x buffer, 20 U of enzyme.
- Incubate at enzyme's optimal temperature for 1 hour and 3 hours (to check time dependence).
- Run 100 ng of each digest on a 1% agarose gel to assess completeness. Compare uncut vs. cut band intensities.
- Ligation & Transformation:
- Purify the digested fragments.
- Ligate each into a pre-digested vector at a 3:1 insert:vector ratio.
- Transform into competent E. coli, plate on selective media.
- Count colonies after overnight incubation.
Data Analysis: Compare colony counts between flank-length conditions. Optimal flank length yields the highest number of correct colonies with complete digestion on the gel.
The Scientist's Toolkit: Research Reagent Solutions
Table 2: Essential Reagents for Primer Design & Restriction Cloning Experiments
| Reagent / Material | Function & Importance |
|---|---|
| High-Fidelity DNA Polymerase (e.g., Q5, Phusion) | Minimizes PCR errors in the critical restriction site and flanking sequences. |
| PCR Purification Kit | Removes dNTPs, primers, and enzyme that can inhibit subsequent restriction digestion. |
| Methylation-Sensitive Restriction Enzymes | Essential if amplifying from genomic DNA; ensures target site is not protected by dam/dcm methylation. |
| Rapid DNA Ligation Kit | Efficiently ligates sticky-ended PCR products into vectors, especially when insert concentration is low due to poor digestion. |
| Competent E. coli (High Efficiency) | Crucial for recovering clones from low-efficiency ligations resulting from suboptimal digestion. |
| Sequence-Specific Restriction Enzyme Buffer | Using the manufacturer's recommended buffer is vital for achieving 100% activity and avoiding star activity. |
Visualizations
Title: Workflow for Cloning PCR Products with Restriction Site Proximity Issue & Solution
Title: Primer Structure and Enzyme Cleavage of PCR Product with Flanking Bases
Troubleshooting Guides & FAQs
Q1: Why did my restriction digestion fail after PCR amplification, despite using the correct buffer and incubation time? A: This is a common proximity issue in PCR fragment digestion. The PCR product ends can be "breathing" (transiently melting and reannealing), which may sterically hinder the restriction enzyme's access to its cognate site, especially if the site is very close to the terminus (<10 bp). Use a high-fidelity polymerase that generates blunt or A-overhang ends consistently, then consider a polishing step or adding a 5-10 bp buffer sequence upstream of the restriction site in your primer design.
Q2: What is star activity and how can I minimize it during long digestions of precious PCR-amplified fragments? A: Star activity is the relaxation of an enzyme's specificity, leading to cleavage at non-canonical sites. It is often induced by prolonged incubation (>16 hours), high glycerol concentration (>5% v/v), excessive units of enzyme, or non-optimal buffer conditions (e.g., high pH, low ionic strength). For critical PCR fragments, use High-Fidelity (HF) restriction enzymes engineered for reduced star activity. Adhere to recommended incubation times and always use the manufacturer's specified buffer.
Q3: How do I choose between a standard and a high-fidelity restriction enzyme for cloning a PCR fragment? A: The choice hinges on experimental rigor and fragment characteristics. Use High-Fidelity enzymes when: 1) The restriction site is within 15 bp of the fragment end, 2) You require overnight digestion, 3) The sequence contains secondary sites similar to the canonical one, or 4) The substrate is precious or complex (e.g., multiplex PCR products). Standard enzymes are suitable for robust, canonical sites with controlled, short incubation times.
Q4: My digestion efficiency dropped when digesting two adjacent sites on a small PCR fragment. Is this a proximity effect? A: Yes. Digestion of two adjacent sites can be inefficient due to enzyme crowding and competition for binding. If the fragment between the two sites is very small (<25 bp), the first cut may release a tiny fragment that remains bound, blocking the second cut. A sequential digestion, purifying the intermediate product, or using two enzymes from a compatible buffer system is recommended.
Data Presentation
Table 1: Comparison of Standard vs. High-Fidelity Restriction Enzymes
| Feature | Standard Enzyme | High-Fidelity (HF) Enzyme |
|---|---|---|
| Typical Star Activity Onset | >4 hours in suboptimal conditions | >16 hours, even in stress conditions |
| Glycerol Tolerance | Low (<5% v/v recommended) | High (often tolerant up to 10% v/v) |
| Optimal Incubation Time | 1 hour - 4 hours | 15 minutes - 16 hours |
| Success Rate on Suboptimal Sites (e.g., near ends) | ~60-70% | >95% |
| Relative Cost | 1x | 1.2x - 1.5x |
| Primary Use Case | Routine digestion of plasmid DNA with canonical sites | Critical applications: cloning PCR fragments, digests near DNA ends, long incubations |
Table 2: Troubleshooting Proximity Issues in PCR Fragment Digestion
| Symptom | Potential Cause | Recommended Solution |
|---|---|---|
| Partial or No Digestion | Site <10 bp from 5' end | Redesign primer to add 5-10 bp 5' buffer sequence. |
| Unexpected Banding Pattern | Star activity from long incubation | Switch to HF enzyme; reduce incubation time. |
| Incomplete Double Digest | Enzyme crowding/competition | Perform sequential digestion with purification between steps. |
| Poor Ligation Efficiency | Damaged ends from star activity | Gel-purify fragment after digestion to remove damaged ends. |
Experimental Protocols
Protocol: Sequential Restriction Digestion of Adjacent Sites on a PCR Fragment
- Design: Amplify target using a high-fidelity polymerase. Ensure primers include necessary buffer sequences (≥8 bp) upstream of restriction sites.
- First Digestion: Set up digestion with Enzyme A in its optimal buffer. Use 1 µg of purified PCR product and 10 units of enzyme. Incubate at recommended temperature for 1 hour.
- Purification: Clean up the reaction using a spin column-based PCR purification kit to remove Enzyme A, its buffer, and the small released fragment.
- Second Digestion: Resuspend purified DNA in the optimal buffer for Enzyme B. Add 10 units of Enzyme B. Incubate at its recommended temperature for 1 hour.
- Validation: Run 10% of the final product on an agarose gel alongside uncut PCR product to confirm complete digestion.
Protocol: Minimizing Star Activity in Overnight Digests
- Enzyme Selection: Use a High-Fidelity (HF) version of the required restriction enzyme.
- Reaction Setup: Keep final glycerol concentration <5%. Use the manufacturer-provided HF buffer.
- Enzyme Volume: Do not exceed 10% of the total reaction volume with enzyme stock. Use only the recommended units per µg DNA.
- Incubation: Incubate at the recommended temperature (not 37°C by default if a lower temperature is specified) for up to 16 hours.
- Termination: Heat-inactivate if possible, or purify DNA immediately post-digestion.
Diagrams
Enzyme Selection Workflow for PCR Fragments
Decision Logic for Enzyme Type Selection
The Scientist's Toolkit: Research Reagent Solutions
| Item | Function in PCR Fragment Restriction Digestion |
|---|---|
| High-Fidelity PCR Polymerase | Generates high-yield, accurate PCR products with minimal nucleotide misincorporations that could alter restriction sites. |
| HF Restriction Enzymes | Engineered variants that exhibit dramatically reduced star activity, allowing for longer incubations and tolerating broader reaction conditions. |
| PCR Clean-up / Gel Extraction Kit | Essential for purifying PCR products prior to digestion and for purifying intermediate products in sequential digests. |
| Universal Restriction Enzyme Buffer (e.g., rCutSmart) | A single buffer that supports >100% activity of many common enzymes, simplifying double digests and maintaining fidelity. |
| DNA Gel Loading Dye (No SDS) | Loading dyes containing SDS can inhibit downstream enzymatic reactions; use dye without SDS for fragments to be extracted and digested. |
| Thermophilic Restriction Enzymes | Enzymes active at 65°C can be used in a "digest-ligation" one-pot system, reducing handling and proximity issues with standard 37°C enzymes. |
Troubleshooting Guides and FAQs
Q1: Why might a standard restriction digestion protocol fail to completely digest a PCR-amplified fragment, and what are the first corrective steps? A1: Incomplete digestion of PCR fragments is a common proximity issue in cloning workflows. Primary causes include insufficient enzyme activity due to impurities in the PCR product (e.g., residual dNTPs, primers, polymerase, salts) or the presence of enzyme inhibitors. The first corrective steps are: 1) Purify the PCR fragment using a spin column or gel extraction kit to remove contaminants. 2) Increase the volume of the reaction to dilute potential inhibitors. If these do not work, proceed to modified digestion protocols involving increased enzyme units and extended incubation.
Q2: How much can I safely increase the units of restriction enzyme in a digestion reaction? A2: A standard reaction uses 1 unit of enzyme per µg of DNA in 1 hour. For problematic PCR fragments, you can increase to 5-10 units per µg. Most enzymes are supplied in glycerol-based storage buffers; the total volume of enzyme added should not exceed 10% of the reaction volume to prevent star activity (non-specific cleavage) due to excess glycerol.
Q3: Can extending the incubation time improve digestion efficiency, and are there limits? A3: Yes, extending incubation time is often effective. Many enzymes remain active for 16 hours (overnight) without significant loss of specificity. For extremely stubborn fragments, incubations up to 24 hours can be used. Always ensure the reaction is at the optimal temperature for the enzyme (typically 37°C). Adding more BSA (if required by the enzyme) can help stabilize it during long incubations.
Q4: What specific modified protocol do you recommend for digesting a purified but stubborn PCR fragment? A4: Use the following sequential troubleshooting protocol:
- Standard Digestion: 1 µg DNA, 1x buffer, 1 unit/µg enzyme, 1 hour. Check by gel.
- Increased Units: 1 µg DNA, 1x buffer, 5 units/µg enzyme, 1 hour.
- Extended Time: 1 µg DNA, 1x buffer, 5 units/µg enzyme, 16 hours (overnight).
- Combined & Diluted: Dilute DNA 2-fold in reaction, 1x buffer, 5 units/µg enzyme, 16 hours.
Q5: After implementing a modified high-unit, long-incubation protocol, I observe unexpected bands on the gel. What is happening? A5: Unexpected bands indicate potential star activity (non-specific cutting) or the presence of a contaminating nuclease. Star activity is triggered by high glycerol concentration (>5% v/v), excessive units of enzyme, incorrect buffer (low ionic strength, high pH), or prolonged incubation. To remedy: 1) Ensure the enzyme volume is ≤10% of total reaction. 2) Use the manufacturer's recommended buffer exactly. 3) If star activity persists, reduce units to 2-3/µg and use a shorter time (4-6 hours).
Data Presentation
Table 1: Comparison of Standard vs. Modified Digestion Protocols for Stubborn PCR Fragments
| Protocol Parameter | Standard Protocol | Modified Protocol 1 (Increased Units) | Modified Protocol 2 (Extended Time) | Modified Protocol 3 (Combined) |
|---|---|---|---|---|
| DNA Amount | 1 µg | 1 µg | 1 µg | 0.5 µg (in diluted mix) |
| Enzyme Units per µg DNA | 1 U/µg | 5 U/µg | 1 U/µg | 5 U/µg |
| Incubation Time | 1 hour | 1 hour | 16 hours (overnight) | 16 hours (overnight) |
| Total Reaction Volume | 20 µL | 20 µL | 20 µL | 40 µL |
| Expected Efficiency | 90-95% for clean DNA | ~95% for mild issues | ~98% for slow kinetics | >99% for stubborn fragments |
| Risk of Star Activity | Very Low | Moderate (if glycerol >5%) | Low | High (monitor carefully) |
Experimental Protocols
Detailed Methodology for Modified Digestion Protocol (Combined Approach)
Objective: To completely digest a purified PCR fragment resistant to standard conditions. Reagents: Purified PCR fragment, restriction enzymes (EcoRI, BamHI), 10x reaction buffer, molecular biology grade water, BSA (if required). Equipment: Thermostatic water bath or incubator, microcentrifuge, electrophoresis system.
Procedure:
- Reaction Setup: In a sterile microcentrifuge tube, combine the following on ice:
- DNA (Purified PCR fragment): 0.5 µg
- 10x Reaction Buffer: 4 µL
- 100x BSA (if required): 0.4 µL
- Restriction Enzyme 1 (e.g., EcoRI, 20 U/µL): 0.125 µL (2.5 U total, 5 U/µg)
- Restriction Enzyme 2 (if double digest): As per compatible buffer guidelines
- Molecular Biology Grade Water: to 40 µL final volume.
- Critical: The total volume of added enzyme(s) should not exceed 4 µL (10% of total).
- Incubation: Mix gently by pipetting. Centrifuge briefly. Incubate in a water bath at the enzyme's optimal temperature (e.g., 37°C) for 16 hours (overnight).
- Enzyme Inactivation: After incubation, heat-inactivate the enzyme if possible (e.g., 65°C for 20 minutes for many enzymes). If heat inactivation is not possible, proceed directly to gel purification.
- Analysis: Run 10 µL of the reaction on a 1-2% agarose gel alongside uncut DNA and a molecular weight ladder to confirm complete digestion.
Visualizations
Title: Troubleshooting Flow for Incomplete Digestion
Title: PCR Fragment to Digested Product Workflow
The Scientist's Toolkit
Table 2: Research Reagent Solutions for Modified Digestion Protocols
| Item | Function in Protocol | Key Consideration |
|---|---|---|
| High-Fidelity PCR Purification Kit | Removes primers, dNTPs, polymerases, and salts that inhibit restriction enzymes. Essential pre-step before modified digestion. | Ensure elution is in low-EDTA TE buffer or water. |
| Restriction Enzyme (High Concentration) | Provides the necessary catalytic activity to cut DNA at specific sequences. High-concentration stocks allow adding more units without exceeding 10% glycerol limit. | Check for compatible buffers for double digests. |
| 10x Reaction Buffer with BSA | Provides optimal ionic strength, pH, and cofactors (like Mg2+). BSA stabilizes enzymes during long incubations. | Use the manufacturer's specified buffer for each enzyme. |
| Molecular Biology Grade Water | Serves as the reaction diluent. Must be nuclease-free to prevent DNA degradation during long incubations. | Avoid DEPC-treated water if it inhibits your enzyme. |
| Agarose Gel Electrophoresis System | Critical for analyzing digestion completeness and checking for star activity post-incubation. | Use appropriate percentage gel for fragment resolution. |
| Heat Block/Water Bath | Provides stable, precise temperature control for extended incubation periods (up to 24 hours). | Ensure temperature uniformity and stability. |
Troubleshooting Guide & FAQs
Q1: During a double digest experiment for analyzing PCR fragment proximity, no digestion products are observed on the gel. What could be wrong?
A: This is a common issue with several potential causes:
- Incomplete Digestion: The primary or secondary (internal) restriction site may be masked by DNA secondary structure or protein binding. Ensure an adequate amount of enzyme (typically 10-20 units per µg DNA) and extend digestion time to 2-4 hours.
- Buffer Incompatibility: The two enzymes used may not be active in the same buffer. Check the manufacturer's compatibility charts. Sequential digestion, with a buffer change and purification step in between, is often required.
- Inactive Enzyme: Enzyme activity can be compromised by repeated freeze-thaw cycles or improper storage. Always store enzymes at -20°C and use dedicated, frost-free freezers.
Q2: We get unexpected band sizes after the double digest. How should we interpret this?
A: Unexpected band sizes are central to the thesis on digestion proximity issues. They can indicate:
- Protein-DNA Interactions: A protein bound near the restriction site can physically block enzyme access.
- DNA Methylation: Methylation of cytosine or adenine within the recognition sequence can inhibit many restriction enzymes.
- Sequence Polymorphism/Mutation: A single nucleotide polymorphism (SNP) or point mutation in the PCR fragment has altered or destroyed the restriction site.
- Proximity-Induced Steric Hindrance: In complex DNA structures, two cut sites in close physical proximity may interfere with the simultaneous binding of two enzyme molecules.
Q3: What are the best practices for designing the internal ("second") restriction site for this approach?
A: The internal site is critical for diagnosing local structural issues.
- Selection: Choose a site that is 20-150 base pairs internal to the primary diagnostic site. This distance is short enough to be sensitive to local changes but long enough to produce a clearly resolvable fragment.
- Enzyme Choice: Prefer enzymes with high activity in common buffers (e.g., NEBuffer 3.1 or CutSmart) and that produce cohesive ends for easier downstream analysis.
- Control: Always include a single-digest control for each enzyme and an undigested PCR fragment control on the same gel.
Q4: How do we differentiate between a failed digestion and a true "proximity issue" indicating a protein-bound state or complex structure?
A: A systematic control experiment is required. The quantitative data from such an experiment should be tabulated as follows:
Table 1: Interpretation of Double Digest Results
| Experimental Condition | Expected Result if Site is Accessible | Expected Result if Site is Blocked (Proximity Issue) | Interpretation |
|---|---|---|---|
| Undigested PCR Fragment | Single high-molecular-weight band. | Single high-molecular-weight band. | Baseline control. |
| Digest with Enzyme A (Primary Site) | Two bands of predicted sizes. | One band (uncut) or partial digestion smear. | Tests primary site accessibility. |
| Digest with Enzyme B (Internal Site) | Two bands of predicted sizes. | One band (uncut) or partial digestion smear. | Tests internal site accessibility. |
| Double Digest (A + B) | Three or more bands, with the smallest being the fragment between A and B. | Pattern matches either the A-only or B-only digest, indicating one site was blocked. Confirms a localized proximity issue. |
Detailed Experimental Protocol: Double Digest Assay for Proximity Analysis
Objective: To determine if protein binding or local DNA structure near a primary restriction site in a PCR fragment impedes enzyme access, using a second, internal restriction site as a diagnostic control.
Materials:
- Purified PCR fragment (0.5-1 µg/µL)
- Restriction Enzyme A (targets primary site)
- Restriction Enzyme B (targets internal site)
- Compatible reaction buffer (e.g., NEB CutSmart)
- Nuclease-free water
- ͏37°C heat block or incubator
- Agarose gel electrophoresis system
Procedure:
- Set Up Reactions: In four separate, labeled microcentrifuge tubes, assemble the following 20 µL reactions:
- Tube 1 (Undigested Control): 1 µg PCR fragment, 2 µL 10X buffer, nuclease-free water to 20 µL.
- Tube 2 (Enzyme A only): 1 µg PCR fragment, 2 µL 10X buffer, 10 units Enzyme A, nuclease-free water to 20 µL.
- Tube 3 (Enzyme B only): 1 µg PCR fragment, 2 µL 10X buffer, 10 units Enzyme B, nuclease-free water to 20 µL.
- Tube 4 (Double Digest): 1 µg PCR fragment, 2 µL 10X buffer, 10 units Enzyme A, 10 units Enzyme B, nuclease-free water to 20 µL.
- Incubate: Mix gently and incubate all tubes at 37°C for 2 hours.
- Terminate Reaction: Add 4 µL of 6X DNA loading dye to each tube.
- Analyze: Load the entire volume onto a 2% agarose gel stained with ethidium bromide or a safer alternative (e.g., SYBR Safe). Run at 5-8 V/cm alongside a suitable DNA ladder.
- Image and Interpret: Image the gel under UV light. Compare banding patterns to the predictions in Table 1.
Visualizing the Workflow and Hypothesis
Title: Double Digest Experimental Workflow & Decision Tree
The Scientist's Toolkit: Research Reagent Solutions
Table 2: Essential Materials for the Double Digest Proximity Assay
| Item | Function & Rationale |
|---|---|
| High-Fidelity PCR Polymerase (e.g., Q5) | Generates the target fragment with ultra-low error rates, ensuring the restriction site sequences are not mutated during amplification. |
| FastDigest or CutSmart Enzymes | Restriction enzymes formulated for rapid, complete digestion in universal buffers. Crucial for reliable results and buffer compatibility in double digests. |
| DNA Clean-up & Concentration Kit | For purifying PCR fragments prior to digestion and for buffer exchange between sequential digests if required. |
| High-Resolution Agarose | For optimal separation of small DNA fragments (e.g., the 20-150 bp fragment between the primary and internal cut sites). |
| DNA Gel Stain (SYBR Safe) | A safe, sensitive fluorescent dye for visualizing DNA bands; preferred over ethidium bromide for safety and stability. |
| DNA Ladder (100 bp Low Range) | Provides precise size markers for accurate interpretation of digested fragment sizes. |
| Thermocycler with Heated Lid | Essential for consistent, high-yield PCR amplification of the target fragment. |
Technical Support Center: Troubleshooting & FAQs
Thesis Context: This support content is framed within ongoing research into PCR fragment restriction digestion proximity issues, which can critically impact the efficiency of traditional cloning and necessitate the use of alternative, recombination-based methods.
Frequently Asked Questions
Q1: In Gateway cloning, my LR/BP reaction efficiency is very low. What could be causing this? A: Low recombination efficiency is often due to:
- Impure DNA: AttB/P and attL/R entry vectors must be free of contaminants. Re-purify using a phenol-chloroform extraction or a high-quality kit. Ensure OD260/280 is ~1.8.
- Incorrect Concentration Ratios: The optimal molar ratio for the LR reaction (Entry clone : Destination vector) is 3:1 to 5:1. For BP reaction (attB PCR product : Donor vector), use a 5:1 ratio. Deviations significantly reduce yield.
- Enzyme Inactivation: Ensure the Clonase II enzyme mix is thawed on ice and not subjected to repeated freeze-thaw cycles. Include a positive control reaction.
Q2: My Gibson Assembly has a high background of empty vector or incorrect assemblies. How can I optimize it? A: This typically indicates issues with fragment preparation or ratios.
- Overlap Length & Quality: Verify that the designed overlapping ends are 15-40 bp and have a melting temperature (Tm) > 48°C. Avoid secondary structures.
- Fragment Integrity: Run fragments on a gel to ensure they are intact and free of primer dimers. Gel-purify if necessary.
- Vector Digestion: For the linearized vector, perform a complete digestion and dephosphorylation (e.g., with CIP) to prevent re-circularization. Gel purification post-digestion is critical.
Q3: In LIC, I'm getting no colonies after transformation. What are the critical steps? A: LIC is highly dependent on the enzymatic generation of single-stranded overhangs.
- dNTP Omission: The T4 DNA polymerase treatment must be performed in the presence of only the single dNTP that complements the 3' end of your overhang. Contamination with other dNTPs will cause uncontrolled exonuclease activity.
- Buffer Conditions: Use the specified buffer (usually with DTT) for the T4 DNA polymerase step. Incubate at room temperature for exactly 30 minutes, then inactivate by adding EDTA or heating.
- Annealing: After generating compatible overhangs, anneal the fragments at 65°C for 10 minutes and allow to cool slowly to room temperature. Do not use DNA ligase.
Q4: How do proximity issues with restriction sites in PCR fragments affect these methods differently? A: This is a core issue addressed in our thesis research. The table below summarizes the vulnerability:
Table 1: Impact of Restriction Site Proximity Issues on Cloning Methods
| Method | Dependence on Restriction Enzymes | Vulnerability to Internal/Proximal Sites | Mitigation Strategy in Our Research |
|---|---|---|---|
| Gateway | None. Uses site-specific recombination. | Immune. The att sites are added via primers; internal sequences are irrelevant. | The primary solution. Use attB-tailed primers for PCR and recombine directly into Gateway vectors. |
| Gibson Assembly | Optional. Vector can be linearized by PCR or restriction. | Low. If using PCR-linearized vector, risk is zero. If using restriction, choose an enzyme absent from all fragments. | PCR-based linearization is recommended. Design overlaps in safe regions identified via in silico analysis. |
| LIC | Optional. Similar to Gibson. | Low. Similar to Gibson. Internal sites do not affect the single-stranded overhang generation. | Use T4 polymerase treatment on PCR-amplified vector to avoid restriction digestion entirely. |
| Traditional (Baseline) | Mandatory. Requires unique flanking sites. | High. Internal or closely spaced sites prevent complete digestion or fragment integrity, causing failure. | Context of the problem; these alternative methods are studied as solutions. |
Detailed Experimental Protocols
Protocol 1: Gateway Cloning for Problematic PCR Fragments (from Thesis Research) Aim: To clone a PCR fragment containing internal restriction sites too close to the ends for traditional digestion, into an expression vector.
- Primer Design: Design gene-specific primers with the 25-bp attB1 (forward) and attB2 (reverse) sequences added to the 5' ends.
- PCR Amplification: Perform a high-fidelity PCR. Verify product size and purity on an agarose gel. Gel-purify the attB-flanked PCR product.
- BP Reaction: Assemble in a 5 µL volume: 10-20 fmol purified attB PCR product, 10-20 fmol pDONR vector, 1 µL BP Clonase II. Mix well.
- Incubation: Incubate at 25°C for 1-6 hours. Add 1 µL Proteinase K solution and incubate at 37°C for 10 minutes to terminate.
- Transformation: Transform 1 µL into competent E. coli. Select on kanamycin plates for the Entry clone.
- LR Reaction: Mix 10-20 fmol Entry clone, 10-20 fmol Destination vector (e.g., pDEST for expression), 1 µL LR Clonase II. Repeat steps 4-5, selecting on ampicillin plates for the final Expression clone.
Protocol 2: Gibson Assembly Cloning (Restriction-Free Linearization) Aim: To assemble multiple fragments without using restriction enzymes on the vector.
- Fragment Design: Design all fragments (including the vector backbone) to have 20-40 bp overlaps with adjacent pieces. Order fragments as gBlocks or amplify via PCR.
- PCR Amplification of Vector: Amplify the entire vector backbone using primers whose 5' ends contain overlaps to the first and last insert fragments.
- Gel Purification: Run all PCR fragments on a gel. Excise and purify each fragment individually.
- Assembly Reaction: Assemble on ice in a 10 µL volume: 0.02-0.5 pmol of each DNA fragment, 10 µL 2X Gibson Assembly Master Mix. Use equimolar ratios of fragments; vector backbone can be at a 0.2x molar ratio.
- Incubation: Incubate at 50°C for 15-60 minutes.
- Transformation: Transform 2-5 µL into high-efficiency competent E. coli ( > 1 x 10^8 cfu/µg).
Visualizations
Title: Gateway Cloning BP and LR Recombination Workflow
Title: Gibson Assembly Fragment Overlap and Enzyme Action
The Scientist's Toolkit: Research Reagent Solutions
Table 2: Essential Reagents for Alternative Cloning
| Reagent/Material | Function in Context of Proximity Issue Research | Key Consideration |
|---|---|---|
| High-Fidelity DNA Polymerase (e.g., Q5, Phusion) | Amplifies target fragments and vector backbones with minimal errors, essential for PCR-based methods (Gibson, LIC, attB-PCR). | Lower error rate than Taq; required for generating precise overlaps and att sites. |
| Gateway BP/LR Clonase II Enzyme Mix | Catalyzes the site-specific recombination between att sites. The core enzyme for Gateway cloning, bypassing restriction digestion. | Sensitive to freeze-thaw. Always include a positive control reaction to validate enzyme activity. |
| Gibson Assembly Master Mix | Contains T5 exonuclease, DNA polymerase, and ligase in an isothermal buffer to seamlessly assemble multiple overlapping fragments. | Commercial mixes ensure optimal enzyme balance. Critical for one-step, multi-fragment assembly. |
| T4 DNA Polymerase (for LIC) | In the presence of a single dNTP, performs 3'→5' exonuclease activity to create precise, complementary single-stranded overhangs for annealing. | The specific dNTP present defines the overhang sequence. Must be contaminant-free. |
| Gateway-Compatible Vectors (pDONR, pDEST) | Contain the complementary attP or attR sites necessary for the BP and LR recombination reactions, respectively. | Choose the correct antibiotic resistance markers for each stage (e.g., KanR for Entry, AmpR for Expression). |
| cDNA/gDNA Template | Source of the target gene which may contain problematic internal restriction sites. | Sequence verification of the template is crucial to identify site proximity issues in silico before cloning. |
| In Silico Restriction Mapper Software | Used to analyze the target DNA sequence for the presence, proximity, and uniqueness of restriction enzyme recognition sites. | The primary tool for diagnosing the restriction site proximity problem that motivates the use of these alternative methods. |
Diagnosing and Fixing Failed Digestions: A Step-by-Step Guide
FAQs & Troubleshooting
Q1: My diagnostic gel shows a single, bright band at the expected size, but subsequent restriction digestion fails. What could be the cause?
A: A single band confirms product purity from non-specific amplicons but does not guarantee sequence integrity. The PCR product may contain internal, non-targeted sites for your chosen restriction enzyme due to single nucleotide polymorphisms (SNPs) or primer-dimer artifacts that co-migrate with your product. Furthermore, residual PCR components like dNTPs can inhibit downstream enzymatic reactions. Perform a post-PCR purification (e.g., column-based) and quantify the DNA before digestion.
Q2: The diagnostic gel shows multiple bands. How do I proceed?
A: Multiple bands indicate non-specific amplification or primer-dimer formation. Solutions include:
- Optimize Annealing Temperature: Use a thermal gradient PCR to determine the optimal temperature.
- Adjust MgCl₂ Concentration: Titrate MgCl₂ in 0.5 mM increments (1.0 mM to 3.5 mM range).
- Use a Hot-Start Taq Polymerase: Reduces non-specific priming during reaction setup.
- Re-design Primers: Check for secondary structure and complementarity, especially at the 3' ends.
- Perform a Nested PCR: Re-amplify the target band with internal primers for higher specificity.
Q3: How do I accurately determine PCR product size from the gel?
A: Always include an appropriate DNA ladder spanning your expected product size. Measure the migration distance (in mm) of your band and the ladder fragments. Plot the log10(bp) of the ladder fragments against their migration distance to create a standard curve. Interpolate your product's size from this curve. Do not rely on visual estimation.
Q4: No band or a very faint band is observed. What are the troubleshooting steps?
A:
- Check Template Quality & Quantity: Re-quantify template DNA. Ensure it is not degraded.
- Verify Primer Integrity: Resuspend or re-synthesize primers.
- Confirm Thermocycler Program: Verify denaturation, annealing, and extension temperatures/times are correct for your primers and amplicon length.
- Component Reagents: Prepare a fresh master mix, ensuring polymerase, dNTPs, and buffer are not expired or degraded.
- Increase Cycle Number (Cautiously): Increase from 30 to 35 cycles, but be aware this may increase non-specific products.
Q5: The band appears as a smear. What does this mean?
A: A smear typically indicates:
- Degraded Template: Starting genomic DNA is sheared.
- Excessive PCR Cycles: Leads to accumulation of non-specific products and primer-dimer artifacts.
- Too Much DNA Loaded: Overloading the gel well.
- Gel Issues: The agarose gel was run at too high a voltage, causing overheating and band smearing.
Experimental Protocol: Agarose Gel Electrophoresis for PCR Product Analysis
Objective: To separate, visualize, and verify the size and purity of amplified PCR fragments.
Materials:
- PCR product
- DNA ladder (e.g., 100 bp or 1 kb Plus ladder)
- Agarose (molecular biology grade)
- 1x TAE or TBE Buffer
- Gel loading dye (6x)
- DNA intercalating stain (e.g., SYBR Safe, GelRed)
- Gel electrophoresis apparatus and power supply
- UV/Blue light transilluminator and imaging system
Methodology:
- Gel Preparation: Prepare a 1-2% agarose solution in 1x TAE buffer by microwaving until fully dissolved. Cool to ~60°C, add DNA stain per manufacturer's instructions, and pour into a sealed gel tray with a comb.
- Sample Preparation: Mix 5-10 µL of your PCR product with 1-2 µL of 6x loading dye.
- Gel Loading: Once solidified, place the gel in the electrophoresis chamber submerged in 1x TAE buffer. Carefully load your samples and 5 µL of DNA ladder into separate wells.
- Electrophoresis: Run the gel at 5-8 V/cm (distance between electrodes) until the loading dye front has migrated 70-80% of the gel length.
- Visualization & Analysis: Image the gel using a transilluminator. Compare the migration of your sample bands to the ladder to estimate size and assess band purity.
Table 1: Common Gel Anomalies and Their Probable Causes
| Gel Result | Probable Cause | Implication for Downstream Digestion |
|---|---|---|
| Single, sharp band at expected size | Successful, specific amplification. | Proceed with purification and digestion. |
| Single band, incorrect size | Non-specific priming or mis-annealing. | Digestion will likely fail; re-optimize PCR. |
| Multiple discrete bands | Non-specific priming or alternate amplicons. | Impure product; digestion will be incomplete. |
| Faint or no band | PCR failure, low yield, or poor staining. | Insufficient substrate for digestion. |
| Smear across lane | Degraded template, excess cycles, or gel artifact. | Unreliable product; do not proceed. |
Table 2: Recommended Agarose Percentage for Optimal Resolution
| PCR Product Size Range | Agarose Gel Percentage | Optimal Voltage (V/cm) |
|---|---|---|
| 100 - 1000 bp | 1.5% - 2.0% | 8 |
| 500 - 3000 bp | 1.0% - 1.2% | 6 |
| > 3000 bp | 0.7% - 0.8% | 5 |
Visualizations
Title: Diagnostic Gel Analysis Decision Pathway
The Scientist's Toolkit
Table 3: Essential Reagents for PCR Product Verification
| Reagent/Material | Function & Importance |
|---|---|
| High-Fidelity DNA Polymerase | Provides accurate amplification with low error rates, crucial for maintaining restriction sites. |
| DNA Gel Ladder (100 bp & 1 kb+) | Essential molecular weight standard for precise size determination of PCR amplicons. |
| Agarose (Molecular Biology Grade) | Forms the gel matrix for separating DNA fragments by size via electrophoresis. |
| SYBR Safe / GelRed Nucleic Acid Stain | Safer, sensitive fluorescent dyes for visualizing DNA bands under blue light. |
| 6x DNA Loading Dye | Contains dense agents (glycerol/sucrose) for sinking samples into wells and tracking dyes (e.g., bromophenol blue) to monitor migration. |
| 1x TAE Buffer | The most common running buffer for agarose gels; maintains pH and conductivity. |
| PCR Purification Kit | Removes primers, dNTPs, salts, and enzymes from the PCR product, preventing downstream inhibition. |
| DNA Quantification System (Nanodrop/Qubit) | Accurately measures DNA concentration post-purification to ensure optimal amounts for digestion. |
This technical support center is framed within the context of a broader thesis on resolving PCR fragment restriction digestion proximity issues, where suboptimal reaction conditions are a primary cause of incomplete or star activity. The following guides address common optimization challenges for researchers and drug development professionals.
Troubleshooting Guides & FAQs
Q1: My restriction digest shows incomplete digestion or unexpected bands. Could Mg2+ concentration be the issue? A: Yes. Mg2+ is an essential cofactor for most restriction enzymes. Suboptimal concentration can drastically reduce activity.
- Low Mg2+ (<5 mM): Leads to severely reduced enzyme velocity and incomplete digestion.
- Optimal Mg2+ (5-10 mM): Standard for most enzymes in manufacturer buffers.
- High Mg2+ (>15 mM): Can promote star activity (non-specific cleavage) and inhibit some enzymes.
- Troubleshooting Protocol:
- Set up a series of 20 µL reactions with your DNA fragment.
- Use a constant amount of enzyme (e.g., 5-10 units).
- Vary MgCl2 concentration: 1, 2.5, 5, 7.5, 10, 15 mM.
- Incubate at recommended temperature for 1 hour.
- Analyze via agarose gel electrophoresis. The condition with complete digestion to expected sizes and no smearing indicates the optimal [Mg2+].
Q2: How does monovalent salt (NaCl/KCl) concentration affect digestion, and how do I optimize it? A: Salt concentration critically influences enzyme-DNA binding specificity. Optimization is crucial for problematic fragments.
- Low Salt (<50 mM): Can increase star activity due to reduced binding stringency.
- Optimal Salt (50-100 mM): Standard for high-fidelity activity.
- High Salt (>150 mM): Generally inhibits enzyme activity; some enzymes have specific high-salt requirements.
- Optimization Protocol:
- Prepare a master mix with all components except salt.
- Aliquot and spike with NaCl/KCl to final concentrations: 0, 25, 50, 75, 100, 150 mM.
- Add enzyme last, incubate, and analyze by gel.
- For PCR fragments, start at 50 mM and adjust. If star activity is observed, increase salt in 25 mM increments.
Q3: When should I use DMSO or glycerol, and at what concentration? A: These additives help denature secondary structures in GC-rich or complex DNA but can inhibit enzymes at high levels.
- DMSO (Dimethyl Sulfoxide): Aids in denaturing DNA secondary structures. Use at 1-5% (v/v). >10% often inhibits enzyme activity.
- Glycerol: Present in enzyme storage buffers (typically 50%). High final reaction glycerol (>5% v/v) can promote star activity by lowering water activity.
- Protocol for GC-Rich PCR Fragment Digestion:
- Use standard optimal Mg2+ and salt conditions.
- Add DMSO to final concentrations of 0%, 2.5%, 5%, and 7.5%.
- Include a control with 10% glycerol (common if enzyme volume is >10% of reaction).
- Run digestion and compare completeness. Often 2.5-5% DMSO resolves issues without significant inhibition.
Data Tables
Table 1: Effect of Reaction Components on Restriction Digestion
| Component | Low Concentration Effect | Optimal Range | High Concentration Effect | Primary Purpose |
|---|---|---|---|---|
| Mg2+ | Drastically reduced activity, incomplete digest. | 5 - 10 mM | Star activity, inhibition of some enzymes. | Essential cofactor for catalysis. |
| NaCl/KCl | Possible star activity, low specificity. | 50 - 100 mM | Inhibits most enzymes. | Modulates binding specificity & stability. |
| DMSO | No benefit for secondary structures. | 1 - 5% (v/v) | Inhibits enzyme activity (>10%). | Disrupts DNA secondary structure. |
| Glycerol | N/A (carrier for enzyme). | Keep <5% final* | Promotes star activity, can inhibit. | Enzyme storage stabilizer. |
*Final reaction concentration from enzyme stock addition.
Table 2: Optimization Matrix for PCR Fragment Digestion Issues
| Observed Problem | Suspected Cause | First Parameter to Adjust | Secondary Adjustment |
|---|---|---|---|
| Incomplete Digest | Low [Mg2+], DNA secondary structure | Increase [Mg2+] to 7.5-10 mM | Add 2.5% DMSO |
| Star Activity (Non-specific cuts) | High [Mg2+], Low [Salt], High Glycerol | Increase [NaCl] by 25-50 mM | Reduce enzyme volume to lower glycerol |
| No Activity | Inhibitors from PCR, Very High [Salt] | Dilute PCR template or perform cleanup | Set up a control with lambda DNA |
| Smeared Bands | Enzyme overload, Nuclease contamination | Reduce enzyme units by 50% | Ensure use of fresh, high-quality BSA |
Experimental Protocols
Protocol 1: Systematic Optimization of Mg2+ and Salt
Objective: Determine the optimal MgCl2 and NaCl combination for digesting a problematic PCR-amplified fragment. Materials: See "Research Reagent Solutions" table. Steps:
- Prepare a 10X stock solution of MgCl2 (100 mM) and NaCl (500 mM).
- In a 96-well plate, set up a matrix of 20 µL reactions containing: 1X Reaction Buffer (no Mg), 1 µg PCR fragment, 10 units enzyme, BSA (if required).
- Vary MgCl2 (final: 2, 5, 7.5, 10 mM) across rows.
- Vary NaCl (final: 0, 50, 100, 150 mM) across columns.
- Mix gently, centrifuge briefly. Incubate at enzyme's optimal temperature for 60 minutes.
- Heat-inactivate at 65°C or 80°C (if enzyme is thermolabile).
- Load 15 µL + loading dye onto a 1.5% agarose gel. Run, stain, image.
- Analysis: Identify the well with the cleanest, most complete digestion pattern.
Protocol 2: Additive Screen for GC-Rich Fragment Digestion
Objective: Overcome inhibition due to strong secondary structures in the DNA template. Steps:
- Use the optimal Mg2+/Salt conditions determined from Protocol 1 or standard buffer.
- Set up five 20 µL reactions. To each, add the PCR fragment, enzyme, and buffer.
- Add the following additives to the respective tubes:
- Tube 1: None (Control)
- Tube 2: DMSO to 2.5% (v/v)
- Tube 3: DMSO to 5% (v/v)
- Tube 4: Betaine to 1 M (final)
- Tube 5: Additional BSA to 0.2 mg/mL (final)
- Incubate and analyze as in Protocol 1. Compare band sharpness and completeness.
Visualizations
Diagram Title: Troubleshooting Flow for Restriction Digest Optimization
Diagram Title: Root Cause Analysis of Digest Problems
The Scientist's Toolkit: Research Reagent Solutions
| Item | Function in Optimization | Notes |
|---|---|---|
| MgCl2 (1M Stock) | Source of Mg2+ cofactor. | Critical to vary in optimization. Avoids precipitation in buffer. |
| NaCl (5M Stock) | Source of monovalent ions. | Fine-tunes enzyme specificity. KCl can sometimes be substituted. |
| Molecular Grade DMSO | Additive to disrupt DNA secondary structure. | Use high purity to avoid contaminants that inhibit enzymes. |
| PCR Purification Kit | Removes primers, dNTPs, salts, polymerase from PCR. | Essential step before digesting difficult PCR fragments. |
| BSA (Bovine Serum Albumin, 10 mg/mL) | Stabilizes enzymes, prevents adhesion to tubes. | Use acetylated BSA for enzymes lacking endogenous BSA. |
| Betaine (5M Stock) | Alternative additive for GC-rich DNA. | Can be used at 1-1.5 M final instead of DMSO. |
| Thermolabile Restriction Enzyme | Can be heat-inactivated at 65°C for 20 min. | Allows sequential digestions without purification. |
| High-Fidelity Restriction Buffer | Manufacturer's optimized buffer. | Always use as a baseline; optimize from this starting point. |
In the context of research on PCR fragment restriction digestion proximity issues, selecting the appropriate post-amplification purification technique is critical. Gel extraction and PCR clean-up are two fundamental methods for removing enzymes, primers, nucleotides, salts, and non-specific fragments. The choice directly impacts downstream applications like restriction digestion, cloning, and sequencing by influencing DNA purity, yield, and the presence of inhibitory contaminants.
Technical Support Center
Troubleshooting Guides & FAQs
Q1: My DNA recovery yield after gel extraction is consistently low. What could be the cause? A: Low yield often results from incomplete dissolution of the gel slice or suboptimal binding conditions. Ensure the gel slice is fully dissolved by frequent vortexing during incubation at the recommended temperature (e.g., 50-55°C). Verify that the appropriate volume of binding buffer has been added relative to the gel weight (typically 3 volumes of buffer to 1 volume of gel). Insufficient ethanol concentration in the wash buffer can also reduce DNA binding to the silica membrane.
Q2: Following PCR clean-up, my restriction digestion efficiency is poor. Are there potential carryover inhibitors? A: Yes. PCR clean-up kits often use a high-salt binding buffer and an ethanol-containing wash buffer. Incomplete removal of these salts or ethanol can inhibit downstream enzymatic reactions. Ensure wash buffers are applied correctly and the membrane is thoroughly dried (e.g., 5-minute open-air drying) before elution. Eluting with nuclease-free water instead of TE buffer can be beneficial for immediate restriction digestion, as EDTA in TE can chelate magnesium ions essential for enzyme activity.
Q3: I see multiple bands after a restriction digest of my gel-extracted fragment. Did the extraction fail? A: Not necessarily. This is a key proximity issue in our thesis research. The extra bands may indicate incomplete restriction digestion, often due to co-purification of inhibitors like agarose polysaccharides or ethidium bromide. It can also result from star activity of the restriction enzyme if salts were not fully removed. Re-purify the gel-extracted DNA using a standard PCR clean-up protocol to remove these potential inhibitors before a second digest.
Q4: Which method should I use to remove primer dimers before cloning? A: PCR clean-up is sufficient if your target band is the dominant product. However, if primer dimers are similar in size to your target amplicon or are present in significant amounts, gel extraction is mandatory to physically isolate the correct fragment, thereby preventing dummy clones.
Q5: My sequencing results of a cloned insert show mutations not present in the original PCR. Which purification step introduced them? A: Neither purification method typically introduces mutations. The mutations likely originated from PCR amplification errors. Consider using a high-fidelity DNA polymerase for the initial amplification. Both gel extraction and PCR clean-up simply purify the existing DNA fragments; they do not amplify or alter the sequence.
Table 1: Quantitative Comparison of Gel Extraction vs. PCR Clean-up
| Parameter | Gel Extraction | PCR Clean-up |
|---|---|---|
| Primary Purpose | Isolate specific DNA fragment from agarose gel | Purify target DNA from a PCR reaction mix |
| Typical Yield | 50-80% | 85-95% |
| Average Time | 30-45 minutes | 10-15 minutes |
| Size Selection | Yes, precise isolation by size | No, removes only impurities below ~100 bp (primers) |
| Inhibitor Risk | Higher (agarose, dyes) | Lower (focuses on salts, dNTPs, enzymes) |
| Optimal Fragment Size | >100 bp | >100 bp |
| Downstream Application | Cloning, when non-specific products present | Routine digestion, sequencing, cloning (clean product) |
Experimental Protocols
Protocol 1: Modified Gel Extraction for Restriction Digestion-Sensitive Fragments
- Run Gel: Perform agarose gel electrophoresis using a low-concentration (0.8-1.0%), high-purity agarose. Use a SYBR-safe dye instead of ethidium bromide to minimize inhibition.
- Excise Slice: Under blue-light transillumination, excise the target band with a clean, sharp scalpel. Minimize gel volume.
- Dissolve: Weigh the slice. Add 3 volumes of membrane-binding buffer (e.g., from a commercial kit) per 1 volume of gel (100 mg ≈ 100 µL). Incubate at 55°C with vortexing every 2-3 minutes until completely dissolved.
- Bind & Wash: Transfer dissolved gel solution to a spin column. Centrifuge. Wash twice with 700 µL of the provided wash buffer (ensure ethanol is added).
- Dry & Elute: Dry column by centrifugation for 2 minutes. Elute DNA in 20-30 µL of pre-warmed (55°C) nuclease-free water (not TE) to maximize compatibility with subsequent restriction digest.
Protocol 2: PCR Clean-up for Maximum Enzyme Compatibility
- Bind: Add 5 volumes of binding buffer (e.g., PB buffer from QIAquick kit) to 1 volume of the PCR reaction. Mix thoroughly.
- Apply to Column: Transfer the mixture to a silica membrane spin column. Centrifuge for 1 minute at ≥10,000 x g. Discard flow-through.
- Wash: Add 750 µL of wash buffer (PE buffer containing ethanol) to the column. Centrifuge for 1 minute. Discard flow-through. Repeat the wash step once.
- Dry: Centrifuge the empty column for an additional 2 minutes to remove residual ethanol completely.
- Elute: Place column in a clean 1.5 mL microcentrifuge tube. Apply 25-30 µL of nuclease-free water to the center of the membrane. Let it stand for 2 minutes, then centrifuge for 1 minute to elute purified DNA.
Visualization
Title: Gel Extraction Workflow for Downstream Digest
Title: PCR Clean-up Protocol Overview
Title: Purification Method Decision Tree
The Scientist's Toolkit
Table 2: Research Reagent Solutions for Purification & Downstream Processing
| Item | Function | Key Consideration |
|---|---|---|
| High-Fidelity DNA Polymerase | Amplifies target fragment with minimal error rates. | Critical for cloning to prevent sequence mutations before purification. |
| Low-Melting Point Agarose | Matrix for gel electrophoresis prior to extraction. | Facilitates easier and more complete dissolution of gel slices. |
| SYBR Safe DNA Gel Stain | Intercalating dye for visualizing DNA bands. | Less inhibitory to downstream enzymes than ethidium bromide. |
| Silica Membrane Spin Columns | Core of most commercial kits; binds DNA in high salt. | Ensure proper pH and salt concentration for binding. |
| Binding Buffer (High Salt, pH ~6) | Creates conditions for DNA adsorption to silica. | Volume must be adjusted relative to gel mass. |
| Wash Buffer (Ethanol/Salt) | Removes salts, enzymes, and other impurities. | Complete evaporation of ethanol is vital for enzyme compatibility. |
| Nuclease-Free Water | Elution buffer for purified DNA. | Preferred over TE for immediate restriction digestion. |
| Restriction Endonucleases | Cuts DNA at specific sequences for cloning. | Activity is highly sensitive to salt, glycerol, and organic carryover. |
| DNA Ligase | Joins restricted insert to vector. | Similarly sensitive to purity of both insert and vector preparations. |
Using Phusion or Other High-Fidelity Polymerases to Reduce 3' A-Overhangs
This technical support center addresses common issues related to 3' A-overhang management in PCR products, a critical factor in our broader thesis research on PCR fragment restriction digestion proximity issues. Unwanted A-overhangs can impede precise, seamless cloning and downstream enzymatic manipulations.
Frequently Asked Questions (FAQs)
Q1: Why are 3' A-overhangs problematic for my restriction digestion and cloning experiments? A: In the context of our research on digestion proximity, 3' A-overhangs (nontemplated nucleotide additions) can interfere with the precise ends required for efficient restriction enzyme cleavage, especially when cut sites are near the fragment terminus. This can lead to incomplete digestion, reduced ligation efficiency, and increased background during cloning.
Q2: How do high-fidelity polymerases like Phusion reduce A-overhangs compared to Taq polymerase? A: Taq polymerase possesses intrinsic terminal transferase activity, preferentially adding a single A-nucleotide to the 3' ends of blunt PCR products. High-fidelity enzymes like Phusion, Q5, and KAPA HiFi are engineered from proofreading polymerases (e.g., Pyrococcus species) that lack this activity, resulting in a higher proportion of blunt-ended fragments.
Q3: I used Phusion polymerase, but my gel purification shows a smear. Could this still be related to overhangs? A: While Phusion significantly reduces A-addition, smearing can result from other factors critical to our proximity research: exonuclease activity during prolonged incubation, PCR mis-priming, or degraded template. Ensure you are using a recommended proofreading protocol with minimal extension time and high-quality reagents.
Q4: How can I verify if my PCR product has blunt ends or residual A-overhangs before digestion? A: Perform a diagnostic ligation with a T-overhang vector control. Alternatively, use a post-PCR treatment protocol with a proofreading polymerase (see below). Analysis via careful high-resolution gel electrophoresis or fragment analyzer can also indicate heterogeneity at the termini.
Q5: My restriction sites are very close to the end of my amplicon. What is the best polymerase and protocol to ensure complete digestion? A: For digestion proximity issues, we recommend using a high-fidelity polymerase with the highest blunt-end fidelity (like Q5 or Phusion) followed by a dedicated blunting step. Consider designing primers with 5-6 base pairs additional sequence beyond the restriction site to allow the enzyme stable binding.
Troubleshooting Guides
Issue: Inefficient Restriction Digestion of PCR Fragments (Suspected A-Overhang Interference) Symptoms: Partial or no digestion observed on gel; failed ligation into blunt-end or precise sticky-end vectors. Solution Steps:
- Post-PCR Treatment: Treat purified PCR product with a proofreading polymerase in a brief incubation to polish ends. Protocol: Combine 1 µg PCR product, 1 unit of DNA polymerase (e.g., Pfu, T4 DNA Pol), 100 µM dNTPs in 1x corresponding buffer. Incubate at 72°C for 5-15 minutes. Heat-inactivate.
- Optimized PCR Protocol: Use a high-fidelity polymerase with a final extension step designed for maximum bluntness. Protocol: After the final PCR cycle, add a 5-minute extension at 72°C to ensure all fragments are fully extended. Then, implement a 4°C hold. Avoid "final extension" times longer than 10-20 minutes.
- Validation: Run treated and untreated samples on a high-percentage agarose gel (2.5-3%) alongside a low molecular weight ladder to assess size homogeneity.
Issue: High Background or Low Clone Yield in Cloning After Digestion Symptoms: Many colonies on negative control plates; few correct clones sequenced. Solution Steps:
- Gel Purify After Digestion: Always gel-purify the digested insert and vector to remove incomplete products and enzymes.
- Phosphatase Treatment: De-phosphorylate the digested vector with CIP or SAP to prevent re-circularization.
- Vector:Insert Ratio Titration: Perform a ligation gradient (e.g., 1:1, 1:3, 1:7 molar ratio) to find the optimal condition for your fragment, especially when ends are suboptimal.
Comparative Data: Polymerase Blunt-End Fidelity
Table 1: Comparison of Common PCR Polymerases and 3' A-Overhang Tendency
| Polymerase | Type | 3'→5' Exonuclease (Proofreading) | 3' A-Overhang Tendency | Recommended for Proximity Digestion? |
|---|---|---|---|---|
| Taq (Standard) | Family A | No | Very High | No |
| Taq (Hot Start) | Family A | No | Very High | No |
| Phusion HS II | Family B | Yes | Very Low | Yes |
| Q5 Hot Start | Family B | Yes | Extremely Low | Yes (Preferred) |
| KAPA HiFi | Modified Pyrococcus | Yes | Low | Yes |
| Pfu (Native) | Family B | Yes | None (Blunt) | Yes (but slower) |
Table 2: Post-PCR Treatment Efficiency for Blunt-End Generation
| Treatment Method | Incubation | Efficiency* | Additional PCR Cycles Required? |
|---|---|---|---|
| None (Taq product) | N/A | <10% | No |
| Proofreading Polishing | 72°C, 15 min | >90% | No |
| dATP Limitation | PCR with low dATP | Variable (~60%) | Not Applicable |
| Exonuclease I/Shrimp Alkaline Phosphatase | 37°C, 30 min | No Direct Effect | No |
*Efficiency defined as % of fragments suitable for blunt-end ligation.
Experimental Protocols
Protocol 1: PCR Amplification for Maximum Blunt-Ends Using Phusion Polymerase Objective: Generate amplicon with minimal 3' A-overhangs for downstream restriction digestion with close cut sites.
- Setup a 50 µL reaction:
- 1x Phusion HF Buffer
- 200 µM each dNTP
- 0.5 µM forward primer
- 0.5 µM reverse primer
- 10-100 ng template DNA
- 1 unit Phusion Hot Start DNA Polymerase
- Cycling Conditions:
- 98°C for 30 sec (Initial Denaturation)
- 35 cycles of:
- 98°C for 5-10 sec
- Tm + 3°C for 15 sec
- 72°C for 15-30 sec/kb
- 72°C for 5 min (Final Extension) – Critical Step
- 4°C hold
- Purify PCR product using a spin column kit optimized for fragment recovery.
Protocol 2: Post-PCR Blunt-End Polishing Objective: Convert any residual 3' or 5' overhangs on purified PCR products to blunt ends.
- Combine in a thin-walled tube:
- 1 µg purified PCR product
- 1x T4 DNA Polymerase Buffer (or Pfu buffer)
- 100 µM each dNTP
- 1-2 units T4 DNA Polymerase (or Pfu polymerase)
- Nuclease-free water to 50 µL.
- Incubate at 25°C for 15 minutes (T4 Pol) or 72°C for 15 minutes (Pfu).
- Heat inactivate at 75°C for 20 minutes (T4) or cool on ice.
- Purify the product using a spin column before restriction digestion.
The Scientist's Toolkit: Research Reagent Solutions
Table 3: Essential Reagents for Managing 3' A-Overhangs
| Reagent | Function in This Context | Example Product |
|---|---|---|
| High-Fidelity DNA Polymerase | Amplifies target with high accuracy and produces blunt-ended products. | Phusion HS II, Q5 Hot Start |
| Proofreading Polymerase for Polishing | Removes 3' and 5' overhangs post-PCR via exonuclease activity. | T4 DNA Polymerase, Pfu polymerase |
| dNTP Set | Provides balanced nucleotides for accurate polymerization; limiting dATP can reduce A-tailing in some systems. | Pure dNTP Solution Mix |
| PCR Purification Kit | Removes primers, enzymes, and salts that can interfere with downstream polishing or digestion. | Column-based silica membrane kits |
| Gel Extraction Kit | Isolates the correctly sized PCR product or digested fragment from agarose, removing primer dimers and nonspecific products. | Gel extraction columns |
| Restriction Enzymes | High-efficiency enzymes for digesting near fragment ends. | FastDigest enzymes (Thermo) or HF enzymes (NEB) |
| DNA Ladder (High-Res) | Allows precise sizing of fragments to detect small mobility shifts from overhangs. | 50 bp or 100 bp increment ladders |
Visualizations
Title: Workflow Impact of Polymerase Choice on Cloning Success
Title: Digestion Proximity Issue with A-Overhang Interference
Troubleshooting Guides & FAQs
Q1: How can I determine if my PCR fragment's restriction site placement is problematic before proceeding with digestion and cloning?
A: The primary indicator is the proximity of the restriction site to the fragment end. If the site is within 10 base pairs of the 5' or 3' end, efficiency drops drastically. Perform an in silico double-digest analysis. If the software indicates a fragment size smaller than 15-20 bp for one of the expected products, the placement is likely unsalvageable. Furthermore, check for star activity potential if overhangs are extremely short (<4 bp).
Q2: What specific experimental results confirm that a primer redesign is necessary versus trying protocol optimizations?
A: The following results, after a standardized digestion of your purified PCR amplicon, indicate a need for redesign:
- Failed Digestion (No Cleavage): Confirmed via gel electrophoresis where the fragment runs at the uncut size, despite using high-fidelity enzymes and optimized buffer.
- Incomplete/Partial Digestion: A smear or multiple bands on the gel, even after extending incubation time to 16 hours and increasing enzyme units 10-fold.
- Non-Specific Degradation: A smear starting at the expected fragment size, indicating enzyme star activity provoked by suboptimal site context.
Q3: Are there quantitative thresholds for "site-to-end" distance that define an unsalvageable design?
A: Yes. Based on current research into proximity issues, the following table summarizes critical distance thresholds for standard Type IIP restriction enzymes (e.g., EcoRI, HindIII, BamHI).
Table 1: Thresholds for Restriction Site Proximity to Fragment End
| Distance from Fragment End (Base Pairs) | Digestion Efficiency | Recommended Action |
|---|---|---|
| < 6 bp | < 10% | Redesign Primers. Unsalvageable. |
| 6 - 10 bp | 10% - 50% | Redesign for reliability. Protocol optimization is high-effort, low-yield. |
| 11 - 15 bp | 50% - 90% | Can be optimized with enzyme excess, longer incubation, and specialized buffers. |
| > 15 bp | > 90% | Standard protocols are sufficient. |
Data synthesized from manufacturer technical bulletins (NEB, Thermo Fisher) and recent journal analyses on cleavage kinetics (2023-2024).
Q4: What is the step-by-step protocol to diagnostically test for site placement failure?
A: Diagnostic Digestion Protocol
- Amplify & Purify: Generate your fragment via PCR using a high-fidelity polymerase. Purify the amplicon using a spin-column-based PCR cleanup kit. Elute in nuclease-free water (not TE buffer, as EDTA can inhibit digestion).
- Setup Diagnostic Digest:
- Reaction Mix:
- Purified PCR fragment: 500 ng
- Restriction Enzyme A: 20 units
- Restriction Enzyme B: 20 units
- Recommended rCutSmart or HF Buffer: 1X
- Nuclease-free water to 50 µL.
- Incubation: 37°C for 4 hours.
- Reaction Mix:
- Control Setup: In parallel, set up a positive control (digestion of a plasmid with known, well-spaced sites) and a negative control (your PCR fragment with no enzyme).
- Analysis: Run the entire digest on a high-percentage agarose gel (2.5-3%) to maximize separation of small size differences. Include a precise low-molecular-weight ladder.
- Interpretation: Compare to controls. If the sample lane matches the uncut negative control or shows a complex smear, the site placement is defective.
Q5: If redesign is necessary, what are the key principles for new primer design to avoid this issue?
A:
- Add a 5' Leader Sequence: Extend the primer 5' end to add 15-25 base pairs of inert sequence (homologous to your vector backbone if doing Gibson assembly, or "protective" sequence) before the restriction site.
- Consider Enzyme Type: Switch to a nicking enzyme or a Type IIS enzyme (e.g., BsaI, Golden Gate assembly) where the cut site is distal to the recognition site, completely bypassing the proximity problem.
- Verify In Silico: Always run the new primer sequence through digest simulation software to ensure the new design yields fragments of appropriate size.
Key Research Reagent Solutions
Table 2: Essential Reagents for Investigating Digestion Proximity Issues
| Reagent / Material | Function in Diagnosis & Solution |
|---|---|
| High-Fidelity (HF) Restriction Enzymes | Minimize star activity, providing cleaner results to distinguish proximity failure from non-specific cleavage. |
| rCutSmart or Universal Buffer | Optimized buffers that support double-digests and enhance efficiency for problematic sites. |
| PCR Cleanup Kit (Silica-membrane) | For complete removal of dNTPs, primers, and salts that can interfere with subsequent digestion efficiency. |
| High-Percentage Agarose (3%) | Provides the resolution needed to visualize small fragments (<100 bp) that indicate partial digestion or failure. |
| Precise DNA Ladder (Low MW) | Essential for accurately sizing fragments near the primer/digestion site. |
| Type IIS Restriction Enzymes (BsaI-HF, BsmBI) | Solution reagent: Allows primer design where the cut site is placed internally within the amplicon, avoiding end-proximity issues entirely. |
| Cloning Kit (Gibson Assembly, NEBuilder) | Solution reagent: Enables seamless cloning without relying on restriction sites at fragment ends, the ultimate bypass. |
Experimental Workflow for Proximity Issue Diagnosis
Diagram 1: Diagnostic Workflow for Site Placement
Primer Redesign Strategy
Diagram 2: Primer Redesign Pathways
Ensuring Digest Completeness: From Gel Analysis to Advanced Assays
This technical support center addresses common issues in analyzing restriction digestion patterns, specifically within the context of PCR fragment restriction digestion proximity issues research. The following guides and FAQs are designed to support researchers, scientists, and drug development professionals in troubleshooting their experiments.
Troubleshooting Guides & FAQs
Q1: I ran my digested PCR fragment on a gel and see a smear or multiple unexpected bands. What does this mean? A1: This pattern typically indicates a partial digestion. The enzyme did not cut all available restriction sites. Common causes include:
- Insufficient enzyme units or reaction time.
- Degraded or impure enzyme (often due to freeze-thaw cycles or improper storage).
- Suboptimal reaction conditions (buffer, temperature, pH).
- The presence of inhibitors in the DNA sample.
- Thesis Context: In proximity research, partial digestion can falsely suggest an alternative fragment size or failed ligation, complicating the analysis of fragment interaction.
Q2: How can I confirm I have achieved a complete digestion? A2: A complete digestion is confirmed by a clean, predictable banding pattern with no residual uncut DNA. Use these controls:
- Undigested Control: Run uncut DNA on the same gel. Its band should be at a higher molecular weight than your digested products.
- Complete Digest Control: Use a well-characterized, standard DNA (e.g., lambda DNA/HindIII digest) with your enzyme to verify enzyme activity.
- Excess Enzyme/Time Test: Perform a parallel digestion with 2-3x the recommended enzyme units or incubation time. If the banding pattern does not change from your standard reaction, your standard conditions are likely sufficient.
Q3: My gel shows no digestion product—only the uncut band. What should I check? A3: This indicates failed digestion.
- Verify Enzyme Activity: Test enzyme on control DNA.
- Check DNA Quality: Ensure your PCR fragment is clean (e.g., use a purification kit to remove salts, dNTPs, primers). Assess A260/A280 ratio (target ~1.8).
- Review Reaction Setup: Confirm you used the correct, manufacturer-recommended buffer. Ensure no component was omitted (especially BSA if required). Verify the incubation temperature is optimal for your enzyme.
- Check for Inhibitors: Ethanol, phenol, EDTA, or high salt from purification can inhibit enzymes. Re-purify the DNA if necessary.
- Thesis Context: Complete failure prevents proximity analysis. This is often a reagent or protocol issue rather than a research finding.
Q4: What does a "star activity" pattern look like, and how is it different from partial digestion? A4: Star activity (non-specific cleavage) occurs under suboptimal conditions (e.g., high glycerol concentration, wrong buffer, excessive enzyme, long incubation). It produces extra, non-specific bands beyond the partial digest ladder. Unlike a partial digest (which shows predictable, larger intermediate fragments), star activity bands may not correspond to known fragment sizes. To mitigate, use recommended buffers, minimize glycerol concentration (<5% v/v), and avoid overdigestion.
Table 1: Diagnostic Gel Band Patterns & Interpretations
| Observed Gel Pattern | Likely Diagnosis | Key Differentiating Feature |
|---|---|---|
| Single, lower band(s) matching predicted size(s) | Complete Digestion | No band at the uncut DNA position. |
| Predicted band(s) PLUS a band at the uncut DNA size | Partial Digestion | Ladder of fragments from uncut to final size. |
| Predicted band(s) PLUS many non-specific bands | Star Activity | Bands at non-predicted, random sizes. |
| Only a band at the uncut DNA size | Failed Digestion | No lower molecular weight products. |
| Smear across a range of sizes | Severe Partial Digestion/Degraded DNA | No distinct bands, DNA appears fragmented. |
Table 2: Troubleshooting Checklist & Protocol Adjustments
| Problem | Possible Cause | Recommended Protocol Adjustment |
|---|---|---|
| Partial Digest | Insufficient enzyme or time | Increase units (e.g., 2x), extend time (e.g., to 2-4 hrs), or add fresh enzyme after 1 hour. |
| Partial Digest | Impure DNA | Re-purify PCR product via silica column or gel extraction. |
| No Digest | Incorrect buffer/temp | Verify enzyme specs and use dedicated buffer. Check water bath/block temp. |
| No Digest | Enzyme inactivated | Use fresh aliquot; avoid freeze-thaw >3x; store at -20°C without frost-free cycles. |
| Star Activity | Non-optimal conditions | Reduce enzyme units, shorten time, ensure correct [glycerol], use high-fidelity buffers. |
Experimental Protocols
Protocol 1: Standard Diagnostic Restriction Digest
Purpose: To cleave a purified PCR fragment for downstream analysis (e.g., cloning, proximity mapping).
- Assemble the following reaction on ice:
- 1 µg Purified PCR fragment DNA
- 1 µL (10 units) Restriction Enzyme (e.g., EcoRI-HF)
- 5 µL Appropriate 10x Reaction Buffer
- Nuclease-free water to 50 µL total volume.
- Mix gently by pipetting. Centrifuge briefly.
- Incubate in a thermocycler or heat block at the enzyme's optimal temperature (typically 37°C) for 1 hour.
- Optional: Heat-inactivate the enzyme (e.g., 65°C for 20 min) if required by downstream steps.
- Analyze 20 µL of the reaction mixed with 4 µL 6x loading dye on a 1-2% agarose gel.
Protocol 2: Optimization for Complete Digestion of Problematic Fragments
Purpose: To achieve complete digestion when standard protocol fails, critical for proximity research accuracy.
- Increase Purity: Perform a second round of PCR product purification using a bead-based or column kit. Elute in 10 mM Tris-HCl (pH 8.5), not water.
- Enhanced Digest Setup:
- Use 2 µg of DNA.
- Use 2 µL (20 units) of restriction enzyme.
- Use 10 µL of 10x buffer.
- Include 1 µL of 100x BSA (if not in buffer).
- Add nuclease-free water to 100 µL.
- Perform a Time-Course: Incubate at optimal temperature. Remove 20 µL aliquots at 30 min, 1 hr, 2 hr, and 4 hr. Immediately heat-inactivate each aliquot.
- Analyze all time-point samples + uncut control on the same high-resolution agarose gel (1.5-2%). The point where the band pattern stabilizes indicates the minimum required time.
Diagrams
Title: Restriction Digest Outcome Decision Tree
Title: Experimental Workflow for Digest Analysis
The Scientist's Toolkit
Table 3: Key Research Reagent Solutions for Restriction Digestion
| Reagent/Material | Function & Importance | Recommended Specs/Notes |
|---|---|---|
| High-Fidelity (HF) Restriction Enzymes | Cut with high specificity under optimized buffers, minimizing star activity. Critical for clean patterns. | NEB HF series or equivalent. Store at -20°C in non-frost-free freezer. |
| 10x Reaction Buffer (with BSA) | Provides optimal pH, ionic strength, and cofactors (e.g., Mg2+). BSA stabilizes enzyme. | Use the manufacturer's specified buffer for each enzyme. Do not substitute. |
| PCR Purification Kit | Removes primers, dNTPs, salts, and polymerase that can inhibit restriction enzymes. | Silica-membrane columns or magnetic beads. Elute in low-EDTA TE or Tris buffer. |
| DNA Gel Extraction Kit | Isolates the specific PCR fragment from primer dimers or non-specific products. | Use when PCR yield has multiple bands. Essential for single-fragment digestion. |
| Molecular Grade Water | Nuclease-free, ensuring no degradation of DNA or enzyme during reaction setup. | Use for all reagent dilution and reaction assembly. |
| DNA Ladder (High-Resolution) | Allows accurate size determination of digested fragments on the agarose gel. | Use a ladder with dense bands in the 100 bp - 10 kb range (e.g., 100 bp ladder). |
| Agarose (Molecular Biology Grade) | Forms a gel matrix for separating DNA fragments by size via electrophoresis. | Use standard agarose for 500 bp - 10 kb fragments. |
Technical Support Center
Troubleshooting Guide
Q1: After performing the re-ligation test, I observe no re-ligated PCR product on my gel. What could be the cause? A: This indicates a failure in the re-ligation step. Common causes include:
- Inactive T4 DNA Ligase: Ensure the enzyme is stored at -20°C and not subjected to repeated freeze-thaw cycles. Include a positive control ligation (e.g., a known compatible, non-self-complementary oligonucleotide pair).
- Incorrect ATP concentration: The ligation buffer's ATP is essential and degrades over time. Use fresh buffer or supplement with fresh ATP.
- Insufficient DNA ends: The initial restriction digest may have been incomplete, leaving blunt ends or damaged 5'-phosphates. Re-purify the digested DNA using a silica-column method to remove enzymes and salts, and ensure the restriction enzyme produced cohesive ends.
- Incorrect molar ratio of insert to vector: For intramolecular re-ligation (re-circularization), use low DNA concentrations (e.g., 1-10 ng/µL) to favor self-ligation over concatemer formation.
Q2: My re-ligation efficiency is highly variable between experiments, affecting the consistency of my cleavage efficiency calculations. How can I stabilize this? A: Variability often stems from inconsistent DNA quantification or reaction conditions.
- Quantification: Use fluorometric assays (e.g., Qubit) instead of absorbance (Nanodrop) for accurate DNA concentration measurement pre- and post-digestion.
- Standardize Purification: Perform a standardized clean-up protocol after the initial restriction digest for every experiment to consistently remove enzymes, salts, and buffers that inhibit ligation.
- Internal Control: Spike the reaction with a control DNA fragment of known size and with a single, different restriction site. Its re-ligation efficiency can be used to normalize your experimental fragment's results.
Q3: During the initial restriction digestion of my PCR fragment, I get unexpected cleavage products. What should I do? A: This is a classic "proximity issue" where secondary structure or protein binding brings non-canonical sites into a favorable configuration.
- Verify Specificity: Perform an in silico analysis of your PCR fragment sequence for potential star activity sites (e.g., sequences differing by 1-2 bases from the canonical site) under your specific digestion conditions (high glycerol, low salt, excessive units of enzyme).
- Optimize Digestion Conditions: Reduce the amount of enzyme (use only 5-10 units/µg DNA) and ensure the recommended salt buffer (e.g., NEBuffer, CutSmart) is used. Incubate for the minimum required time (1-2 hours).
- Re-design PCR Primers: If possible, re-design your amplicon to move the region of interest further from the fragment ends or to eliminate secondary structure near the restriction site.
Q4: How do I accurately calculate cleavage efficiency from my re-ligation assay data? A: Cleavage efficiency is derived from the inverse of re-ligation efficiency. Use band intensity from gel electrophoresis.
- Measure the integrated intensity (I) of the bands: re-ligated product (R) and the linear, digested product (L).
- Calculate Re-ligation Efficiency = I(R) / [I(R) + I(L)].
- Calculate Cleavage Efficiency = 1 - Re-ligation Efficiency. A perfectly efficient digestion (100% cleavage) will yield 0% re-ligation. See Table 1 for an example dataset.
Table 1: Example Calculation of Cleavage Efficiency from Gel Band Intensities
| Sample Condition | Band Intensity (Linear) | Band Intensity (Re-ligated) | Re-ligation Efficiency | Cleavage Efficiency |
|---|---|---|---|---|
| Optimal Digest | 9500 | 500 | 5.0% | 95.0% |
| Partial Digest | 6200 | 3800 | 38.0% | 62.0% |
| Failed Digest | 1200 | 8800 | 88.0% | 12.0% |
Frequently Asked Questions (FAQs)
Q: What is the core principle of the Validation by Re-Ligation Test? A: The test is based on a simple principle: a DNA molecule that has been completely (and correctly) cleaved at its restriction site(s) possesses compatible cohesive ends. These ends can be efficiently re-ligated by DNA ligase back into the original circular or linear form. The percentage of molecules that re-ligate is therefore a direct functional measure of the percentage that were properly cleaved. Inefficient or incorrect cleavage yields ends that are poor substrates for ligation.
Q: How does this assay specifically address "proximity issues" in PCR fragment digestion? A: In the context of our thesis on PCR fragment restriction digestion proximity issues, this assay is functional. Proximity issues—where the local DNA structure near the ends of a short PCR fragment inhibits enzyme binding or cleavage—result in a population of molecules with uncut or mis-cut sites. These molecules will not re-ligate efficiently. By quantifying the re-ligated versus linear products, the assay directly reports the functional consequence of the proximity issue on the end product: ligation-competent ends. It moves beyond simply checking for the disappearance of the starting band.
Q: What are the critical controls for this experiment? A: Essential controls include:
- No-Digest Control: PCR fragment without restriction enzyme. Should show no cleavage.
- Digest-Only Control: Digested fragment, not treated with ligase. Should show no re-ligation.
- Re-ligation Positive Control: A commercially available linearized plasmid with known compatible ends. Verifies ligase activity.
- Sequencing Verification: Sanger sequencing of re-ligated products from key experiments to confirm the fidelity of the junction.
Q: Can I use this method for enzymes that produce blunt ends? A: Yes, but re-ligation efficiency for blunt ends is inherently lower than for cohesive ends. You must use a high concentration of T4 DNA Ligase and a longer incubation time (often overnight at 16°C). Your calculations for cleavage efficiency must be benchmarked against a blunt-end positive control digested and ligated under identical conditions.
Experimental Protocol: Validation by Re-Ligation Test
Title: Functional Assay for Restriction Cleavage Efficiency via Re-Ligation.
Purpose: To quantitatively determine the functional cleavage efficiency of a restriction enzyme on a specific PCR fragment, accounting for potential proximity-related inhibition.
Materials: See "Research Reagent Solutions" table.
Procedure:
- PCR Amplification & Purification: Generate your target fragment using high-fidelity polymerase. Purify using a silica-membrane column. Elute in nuclease-free water or TE buffer. Quantify via fluorometry.
- Restriction Digestion: Set up a 50 µL reaction:
- Purified PCR fragment: 1 µg
- Recommended 10x Reaction Buffer: 5 µL
- Restriction Enzyme: 10 units
- Nuclease-free water to 50 µL.
- Control: Set up an identical reaction without enzyme.
- Incubate at enzyme's optimal temperature for 2 hours.
- Digestion Clean-up: Purify the entire reaction using a PCR clean-up kit. Elute in 30 µL of nuclease-free water or a low-EDTA TE buffer. Quantify the recovered DNA.
- Re-Ligation Reaction: Set up a 20 µL reaction:
- Purified, digested DNA: 50 ng
- T4 DNA Ligase 10x Buffer (with ATP): 2 µL
- T4 DNA Ligase: 1 µL (400 cohesive end units)
- Nuclease-free water to 20 µL.
- Controls: Set up (a) a ligation of the "no-digest" control DNA (should not ligate if ends are incompatible), and (b) a positive control ligation provided in the ligase kit.
- Incubate at 16°C for 4 hours or room temperature for 1 hour.
- Analysis via Agarose Gel Electrophoresis:
- Run the entire ligation reaction on a high-percentage agarose gel (2-2.5%) suitable for resolving small fragments.
- Include a high-resolution DNA ladder.
- Stain with ethidium bromide or SYBR Safe and visualize under UV.
- Quantification & Calculation:
- Use gel analysis software to measure the band intensity of the re-ligated product (higher molecular weight, often same as undigested PCR product) and the linear, digested product.
- Apply the formula in FAQ Q4 and Table 1 to calculate cleavage efficiency.
The Scientist's Toolkit: Research Reagent Solutions
Table 2: Essential Materials for the Re-Ligation Validation Assay
| Item | Function & Rationale |
|---|---|
| High-Fidelity DNA Polymerase (e.g., Q5, Phusion) | Generates the initial PCR fragment with ultra-low error rates, ensuring the restriction site sequence is accurate. |
| Silica-Membrane PCR Purification Kit | Removes primers, nucleotides, and polymerase from the PCR product. Critical post-digestion to remove restriction enzymes and salts that inhibit ligase. |
| Fluorometric DNA Quantification Kit (e.g., Qubit dsDNA HS) | Provides accurate concentration measurements of low amounts of DNA, essential for standardizing inputs to digestion and ligation reactions. |
| Restriction Enzyme with Specific Buffer | The enzyme of interest. Must be used with its manufacturer's recommended buffer for optimal activity and to minimize star activity. |
| T4 DNA Ligase & Corresponding Buffer | The workhorse enzyme for joining DNA ends. The supplied buffer contains essential ATP and DTT. Must be fresh. |
| High-Resolution DNA Ladder (e.g., 50-1000 bp) | Allows precise sizing of the PCR fragment, digested linear product, and re-ligated product on the agarose gel. |
| Agarose Gel Electrophoresis System | Standard apparatus for separating and visualizing DNA fragments by size. A 2-2.5% gel is typically used. |
| Nucleic Acid Gel Stain (e.g., SYBR Safe) | A safe, sensitive fluorescent dye for visualizing DNA bands under blue light or UV transillumination. |
Diagrams
Troubleshooting Guides & FAQs
Peak Anomalies & Data Quality
Q1: My electropherogram shows broad or smeared peaks, making precise sizing difficult. What could be the cause? A: Broad peaks are frequently linked to sample overloading, improper sample cleanup, or issues with the separation matrix. In the context of PCR fragment restriction digestion for proximity studies, residual enzymes, salts, or undigested primer dimers can interfere. Ensure a rigorous post-digestion cleanup using spin columns calibrated for small fragment recovery. Reduce the sample injection volume by 50% as a diagnostic step.
Q2: I am observing unexpected extra peaks or a shift in the expected fragment sizes. A: This is critical for restriction digestion analysis. Extra peaks may indicate incomplete digestion. Verify enzyme activity, ensure the absence of inhibitors from the PCR step, and confirm the recommended buffer and incubation time were used. A size shift often points to an incorrect ladder or standards. Always run a fresh ladder alongside samples. For proximity research, consider if unexpected fragments indicate alternative ligation products or complex formation.
Q3: The reported concentration (quantification) of my fragments is inconsistent with other methods (e.g., Qubit). A: Capillary electrophoresis systems quantify based on fluorescence intercalation. Inaccurate quantification can stem from dye saturation (if the signal is too high) or poor dye incorporation. Ensure your sample is within the instrument's dynamic range (typically 0.1-50 ng/µL for dsDNA). For digested fragments, note that the dye binds base-pair-specifically; a mixture of fragment sizes will yield a weighted average, not an absolute mass concentration.
Instrument & Run Failures
Q4: The instrument fails to complete a run, reporting pressure or clog errors. A: This is often due to particles or crystalline precipitates in the capillary or sipper. Perform the recommended flushing procedures with the appropriate cleaning solutions (e.g., 1N HCl, 80% Ethanol). For prevention, always centrifuge and filter (0.2 µm) all samples and buffers before loading. In restriction digestion workflows, ensure all enzymatic reactions are properly stopped and cleaned up.
Q5: The software shows low or no signal for all samples and the ladder. A: Follow this systematic check:
- Reagents: Confirm all gels, dyes, and buffers are within expiry and were prepared/loaded correctly.
- Ladder: Verify the ladder was added to the correct well and is at the correct concentration.
- Capillary: Check for breakage or severe clogging (see Q4).
- Optics: Run the instrument's diagnostic test for the fluorescence detector. Contact technical support if this fails.
Experimental Protocols
Protocol 1: Assessment of Restriction Digestion Efficiency for Proximity Ligation Fragments
Purpose: To validate complete digestion of PCR-amplified proximity ligation products before downstream analysis.
Materials: Purified PCR fragment, High-fidelity restriction enzyme (e.g., EcoRI-HF), appropriate 10x reaction buffer, Nuclease-free water, Spin column cleanup kit.
Procedure:
- Digestion Setup: In a 0.2 mL tube, combine:
- 100-200 ng Purified PCR fragment
- 1 µL Restriction Enzyme (10 U/µL)
- 2 µL 10x Reaction Buffer
- Nuclease-free water to 20 µL.
- Incubation: Mix gently, centrifuge briefly, and incubate at the enzyme's optimal temperature (typically 37°C) for 1 hour.
- Enzyme Inactivation: Heat-inactivate at 65°C for 20 minutes (if recommended for the enzyme).
- Cleanup: Purify the digest using a spin column kit optimized for DNA fragment recovery. Elute in 15 µL of the provided elution buffer or nuclease-free water.
- Analysis: Dilute 1 µL of the purified product in 9 µL of nuclease-free water. Add 1 µL of this dilution to the Fragment Analyzer/Bioanalyzer sample buffer, heat denature if required, and run on the appropriate sensitivity kit (e.g., HS NGS Fragment kit).
Protocol 2: Precise Sizing and Molar Quantification of Digested Fragments
Purpose: To obtain accurate size and molar concentration of restriction fragments for normalization in subsequent cloning or sequencing steps.
Procedure:
- Sample Preparation: Follow the instrument-specific guide for preparing samples and ladder. Typically, this involves mixing:
- 1 µL of purified digestion product (from Protocol 1, Step 4)
- 9 µL of Gel-Dye Mix (containing fluorescent intercalating dye).
- Loading: Vortex, centrifuge, and load the mixture into the designated well on the instrument plate or chip.
- Run Method: Select the appropriate method (e.g., "DNA-905 Kit" for 35-5000 bp on Fragment Analyzer, "High Sensitivity DNA" on Bioanalyzer).
- Data Analysis: Use the software to align to the ladder. The software will report size (bp) and molar concentration (nmol/L or fmol/µL) for each peak. Export data for further analysis.
Data Presentation
Table 1: Typical Performance Specifications for High-Sensitivity DNA Kits
| Parameter | Fragment Analyzer (HS NGS Fragment Kit) | Bioanalyzer (High Sensitivity DNA Kit) |
|---|---|---|
| Size Range | 35 - 5000 bp | 50 - 7000 bp |
| Sample Volume Required | 1 - 20 ng/µL, 1 µL per sample | 0.1 - 1 ng/µL, 1 µL per sample |
| Molar Concentration Range | ~0.1 - 50 nmol/L | Not directly comparable; uses pg/µL & peak area |
| Size Accuracy (vs. ladder) | ± 5% or ± 5 bp (whichever is greater) | ± 10-15% (standard deviation) |
| Run Time per Sample | ~ 1 hour (12-96 samples/run) | ~ 30 minutes (12 samples/chip) |
Table 2: Troubleshooting Common Restriction Digestion CE Artifacts
| Symptom | Potential Cause | Recommended Action |
|---|---|---|
| Incomplete Digestion | Enzyme inhibitor present, insufficient enzyme, suboptimal buffer. | Re-clean PCR product, increase enzyme units, use manufacturer's recommended buffer. |
| Fragment Size Shift | Incorrect ladder, poor gel matrix condition, high salt in sample. | Use fresh ladder, prepare new gel/dye mix, perform post-digestion cleanup. |
| High Baseline Noise | Dirty capillaries, old reagents, contaminated samples. | Execute capillary wash protocol, use fresh reagents, filter samples. |
| Low/No Signal | Failed dye incorporation, incorrect sample well, detector issue. | Confirm sample prep protocol, check plate/chip loading, run instrument diagnostics. |
Visualizations
Workflow for CE Analysis of Restriction Digestion
Troubleshooting Logic for Broad Peaks
The Scientist's Toolkit: Research Reagent Solutions
| Item | Function in CE of Restriction Fragments |
|---|---|
| High-Sensitivity DNA Kit | Contains gel matrix, dye, ladder, and chips/capillaries specifically formulated for precise sizing and quantification of small DNA fragments. |
| Spin Column Cleanup Kit (PCR & Enzyme Cleanup) | Removes salts, enzymes, primers, and dNTPs from PCR and digestion reactions that can interfere with downstream CE analysis. |
| High-Fidelity (HF) Restriction Enzymes | Engineered enzymes with reduced star activity, ensuring specific cleavage at target sites without artifacts, crucial for interpretable fragment patterns. |
| Nuclease-Free Water | Used to dilute samples and prepare reagents; essential to prevent degradation of samples and contamination of the capillary system. |
| Capillary Cleaning Solutions | Specific acids (e.g., 1N HCl) and solvents (e.g., 80% EtOH) used in maintenance protocols to clear clogs and preserve instrument performance. |
| Optical Reference Dye/Calibration Kit | Used for periodic instrument calibration to ensure fluorescence detection accuracy and consistent quantification between runs. |
In the context of thesis research on PCR fragment restriction digestion proximity issues, verifying the sequence of a cloned construct is a critical, non-negotiable step. This guide provides technical support for researchers and drug development professionals to troubleshoot common sequencing verification problems, ensuring accurate confirmation of insert orientation and junction integrity.
Troubleshooting Guides & FAQs
Q1: My sequencing read shows a sudden drop in quality or stops prematurely at the insert-vector junction. What could be the cause? A: This is a classic symptom of high GC content or secondary structure at the junction, often exacerbated by proximity issues from restriction digestion of PCR fragments. The DNA polymerase used in Sanger sequencing stalls at these regions.
- Solution: Use a sequencing protocol with a specialized polymerase (e.g., GTGG or BigDye with GC enhancers). Alternatively, sequence from the opposite strand or design an internal primer within the insert.
Q2: The sequencing chromatogram is clean, but the alignment shows mismatches or indels precisely at the restriction enzyme sites used for cloning. Why? A: Incomplete or star activity of restriction enzymes during the digestion of the PCR fragment and vector can lead to damaged or "chewed" ends. When ligated, these damaged ends are repaired by the host cell, introducing errors.
- Solution: Optimize restriction digestion conditions (time, enzyme units, absence of contaminants like residual PCR reagents). Always gel-purify digested fragments to isolate perfectly cut ends. Verify digestion completeness with analytical gel electrophoresis.
Q3: My insert sequence is correct, but the orientation is reversed. How do I prevent this? A: This occurs when using a single restriction site or two compatible cohesive ends, allowing the insert to ligate in either direction.
- Solution: Employ a directional cloning strategy using two different, non-compatible restriction enzymes at the ends of your PCR fragment and vector. Always verify orientation by designing a primer that binds near one vector-insert junction and reads into the insert. The sequence obtained should be specific to one orientation.
Q4: How can I be sure the entire insert and both junctions are correct if Sanger read length is limited? A: For larger inserts, a single read is insufficient.
- Solution: Implement a primer walking strategy. Use primers designed at approximately 500-700bp intervals to "walk" across the entire insert. Always include primers flanking both junctions. The table below summarizes verification strategies.
Table 1: Strategies for Comprehensive Sequencing Verification
| Verification Target | Method | Required Primers | Key Advantage |
|---|---|---|---|
| 5' Junction & Insert Start | Single Sanger Read | Vector Forward Primer | Confirms correct ligation point and 5' insert integrity. |
| 3' Junction & Insert End | Single Sanger Read | Vector Reverse Primer | Confirms correct ligation point and 3' insert integrity. |
| Full Insert & Orientation | Primer Walking | Internal Insert Primers | Validates entire insert sequence and unambiguous orientation. |
| Complex or Large Constructs | Next-Generation Sequencing (NGS) | N/A (Whole Plasmid) | Provides complete, deep coverage of the entire clone. |
Detailed Experimental Protocol: Junction Verification by Sanger Sequencing
Objective: To confirm the integrity of both vector-insert junctions and insert orientation for a standard restriction-ligation clone.
Materials (Research Reagent Solutions):
- Purified Plasmid DNA: Miniprep or Midiprep quality (≥ 50 ng/µL).
- Sequence-Specific Primers: One flanking each junction (e.g., T7 promoter primer for 5' junction, SP6 or custom reverse primer for 3' junction).
- Sanger Sequencing Mix: e.g., BigDye Terminator v3.1 Ready Reaction Mix.
- Sequencing Buffer: 5X sequencing buffer.
- Purification Reagents: EDTA, ethanol/sodium acetate, or magnetic beads for post-reaction cleanup.
Methodology:
- Primer Design: Design two primers that bind in the vector backbone ~50-150 bp upstream (Forward) and downstream (Reverse) of the cloning site. This ensures the read spans the entire junction region.
- Sequencing Reaction Setup:
- For each primer, mix in a PCR tube:
- Plasmid DNA: 100-200 ng
- Primer (10 µM): 1.0 µL
- BigDye Mix: 2.0 µL
- 5X Sequencing Buffer: 2.0 µL
- Nuclease-free water to a final volume of 10 µL.
- For each primer, mix in a PCR tube:
- Thermal Cycling:
- 96°C for 1 minute (initial denaturation).
- 25-30 cycles of: 96°C for 10s, 50°C for 5s, 60°C for 4 minutes.
- Hold at 4°C.
- Post-Reaction Cleanup (Ethanol Precipitation):
- Add 10 µL of nuclease-free water to each 10 µL reaction.
- Add 2 µL of 125 mM EDTA, pH 8.0.
- Add 2 µL of 3M Sodium Acetate, pH 5.2.
- Add 50 µL of 100% ethanol.
- Mix well and incubate at room temperature for 15 minutes.
- Centrifuge at >13,000 x g for 20 minutes at 4°C.
- Carefully aspirate supernatant.
- Wash pellet with 70% ethanol, centrifuge for 5 minutes, and aspirate.
- Air-dry pellet for 5-10 minutes and resuspend in 10-15 µL of Hi-Di Formamide or water.
- Capillary Electrophoresis: Run samples on a sequencing instrument.
- Analysis: Align sequencing files (AB1) to the expected construct sequence using software (e.g., SnapGene, Geneious, Benchling). Inspect chromatograms at junctions for clean, unambiguous bases.
Logical Workflow for Sequencing Verification
Workflow for Sequencing Clone Verification
The Scientist's Toolkit: Research Reagent Solutions
Table 2: Essential Materials for Cloning & Verification Experiments
| Item | Function & Rationale |
|---|---|
| High-Fidelity DNA Polymerase (e.g., Q5, Phusion) | Generates PCR fragments with ultra-low error rates, crucial for accurate insert sequence. |
| Restriction Endonucleases (with unique buffers) | Creates specific, compatible ends in vector and insert for directional, efficient ligation. |
| Rapid or T4 DNA Ligase | Catalyzes the formation of phosphodiester bonds between vector and insert ends. |
| Agarose Gel Electrophoresis System | For size-selective purification of digested fragments, removing uncut DNA and small fragments. |
| Gel Extraction/PCR Cleanup Kit | Purifies DNA from enzymatic reactions or agarose gels, removing enzymes, salts, and contaminants. |
| Competent E. coli Cells (High Efficiency) | For transformation of ligation reactions to propagate the plasmid. |
| Plasmid Miniprep Kit | Rapid isolation of plasmid DNA from bacterial cultures for sequencing. |
| Sanger Sequencing Service/Mix | Provides the reagents (dye terminators, polymerase) for cycle sequencing reactions. |
| Sequence Analysis Software | Aligns and analyzes sequencing reads against reference sequences to identify errors. |
Comparative Analysis of Commercial Enzyme Brands for Challenging Sites
This technical support center is framed within the thesis research titled: "Investigating Proximity-Induced Inhibition in Restriction Digestion of Closely Spaced Sites on Amplicons." This work requires robust and efficient restriction enzymes (REs) for challenging digestions, including those with sites in close proximity (<10 bp), star activity-prone buffers, or recalcitrant DNA structures. The following guide aids in troubleshooting and selecting appropriate commercial enzyme brands.
Troubleshooting Guide & FAQs
Q1: Our PCR amplicon has two restriction sites only 5 bp apart. Digestion with our standard enzyme (Brand A) consistently fails. What is the cause and solution? A: This is a classic proximity issue. Bulky enzyme complexes bound to the first site can sterically hinder binding at the adjacent site. Solution: Use enzymes from brands specializing in high-fidelity or "proximity-optimized" formulations. Brands like NEB's HF range and Thermo Scientific FastDigest enzymes are engineered for reduced protein size and faster dissociation, improving efficiency at adjacent sites. Consider a double digest if the sequence allows, using two different enzymes from a single universal buffer system.
Q2: We observe partial or "star" activity when digesting genomic DNA, but not with plasmid controls. Which enzyme properties should we compare? A: Genomic DNA has greater complexity and potential for enzyme slippage. Star activity is buffer and glycerol concentration-dependent. Solution: Compare brands on their proprietary buffer compositions. Quantitative Data Table 1 summarizes critical factors. Use brands offering ultra-pure enzymes in low-glycerol stocks (<5%) and optimized buffers (e.g., NEB CutSmart, Thermo Scientific FastDigest Green). Dilute your DNA to reduce contaminants if using a volume-sensitive buffer.
Q3: What is the most reliable protocol for a sequential digest requiring two enzymes without a shared optimal buffer? A: Perform a buffer compatibility test using the provided protocol below. Clean up the DNA after the first digest to remove the first enzyme and buffer completely.
Experimental Protocol: Sequential Digestion with Intermediate Purification
- First Digestion: Set up 50 µL reaction with 1-5 µg DNA, 1X recommended Buffer A, and 10 units of Enzyme A. Incubate at recommended temperature for 1 hour.
- Purification: Use a spin-column PCR purification kit or ethanol precipitation. Elute/resuspend DNA in 30 µL of nuclease-free water.
- Second Digestion: Add 5 µL of 10X Buffer B, 14 µL nuclease-free water, and 10 units of Enzyme B directly to the 30 µL purified product. Incubate at recommended temperature for 1 hour.
- Analysis: Run on an agarose gel.
Q4: How do we quantitatively compare the cost-effectiveness of different brands for high-throughput screening? A: Calculate the cost per successful digestion, factoring in unit concentration, recommended units per µg of DNA, and buffer compatibility. See Quantitative Data Table 2.
Data Tables
Table 1: Enzyme Brand Comparison for Challenging Sites
| Brand/Product Line | Proximity Efficiency (<10 bp sites) | Star Activity Incidence | Universal Buffer | Heat Inactivation | Price per 1000 units (USD approx.) |
|---|---|---|---|---|---|
| NEB HF | High | Very Low | CutSmart | 65°C for 20 min | $220 |
| Thermo FastDigest | High | Low | FastDigest Green | 80°C for 5 min | $200 |
| Promega Restriction Enzymes | Moderate | Moderate | Core Buffers (A-D) | 65°C for 15 min | $180 |
| Takara Bio | Moderate-High | Low | Multi-Core Buffer | 65°C for 15 min | $210 |
Table 2: High-Throughput Cost Analysis
| Brand | Units per Reaction* | Reactions per 1000U | Cost per 1000U | Cost per Reaction | Compatible Enzymes in UB |
|---|---|---|---|---|---|
| NEB HF | 10 | 100 | $220 | $2.20 | >210 |
| Thermo FastDigest | 5 | 200 | $200 | $1.00 | >130 |
| Promega | 10 | 100 | $180 | $1.80 | ~40 |
| Based on 1 µg challenging DNA. *UB = Universal Buffer* |
Experimental Protocol: Buffer Compatibility Test
Objective: To test the residual activity of Enzyme B in Buffer A (and vice versa) to enable potential double-digests without purification.
Methodology:
- Prepare two master mixes on ice:
- Mix 1 (Test): 1X Buffer A, 1 µg control DNA (e.g., λ DNA), 10U Enzyme B.
- Mix 2 (Control): 1X Buffer B, 1 µg control DNA, 10U Enzyme B.
- Incubate at Enzyme B's optimal temperature for 1 hour.
- Heat-inactivate if possible.
- Analyze fragmentation by agarose gel electrophoresis (1.5% gel, 120V, 45 min).
- Compare the test and control lane patterns. Identical patterns indicate full activity; no digestion indicates incompatibility.
Visualizations
Diagram Title: Mechanism of Proximity Digestion Failure and Success
Diagram Title: Troubleshooting Workflow for Challenging Digestions
The Scientist's Toolkit: Research Reagent Solutions
| Item | Function in Proximity Issues Research |
|---|---|
| High-Fidelity (HF) Restriction Enzymes | Engineered for reduced star activity and reliable cutting at challenging sites, including adjacent ones. |
| Universal/Compatible Buffer Systems | Allows simultaneous or sequential digestion without purification, saving time and DNA yield. |
| PCR Purification Kit | Essential for cleaning DNA between sequential digests with incompatible buffers. |
| DNA Gel Stain (High Sensitivity) | For accurate visualization of partially digested fragments on agarose gels. |
| Thermocycler with Heated Lid | For precise incubation during digestion and potential heat inactivation steps. |
| Validation Control DNA | Plasmid or genomic DNA with known, challenging restriction sites to test new enzyme lots. |
Conclusion
Successfully digesting PCR fragments with end-proximal restriction sites requires a multifaceted understanding that spans structural biology, primer design, protocol optimization, and rigorous validation. By integrating foundational knowledge of enzyme mechanics with practical troubleshooting steps—such as adding flanking bases, optimizing buffer conditions, and employing advanced validation via capillary electrophoresis—researchers can significantly improve cloning efficiency and experimental reproducibility. Moving forward, the continued development of engineered high-activity enzymes and the adoption of seamless cloning techniques promise to further mitigate these challenges, accelerating workflows in synthetic biology, gene therapy vector construction, and precision drug development. A proactive, design-first approach remains the most effective strategy for avoiding this common molecular bottleneck.